If you’re looking for an all-in-one photography software solution that can handle everything from importing and organizing to RAW file development and sophisticated image edits and enhancements, Photo Studio Ultimate for Windows includes several new features to make your photography workflow more efficient. And with its one-time price of $149.99, there’s no required monthly subscription to maintain.
Among the new features in this version (see the complete list below) are an improved import tool that recognizes images you’ve already imported to avoid duplicates; a Smart Erase tool to intelligently remove unwanted objects; and an Actions Browser for quick access to preset actions that can be applied to batches of images, plus the ability to create your own actions by recording your processing steps.
To give you an understanding of what’s possible with Photo Studio Ultimate, let’s take a look at the software’s “modes,” each of which is tailored to a specific aspect of the photo processing workflow.
Manage Mode
Manage mode is where you import, browse, sort, and filter your images, and edit metadata, categories, and keywords.
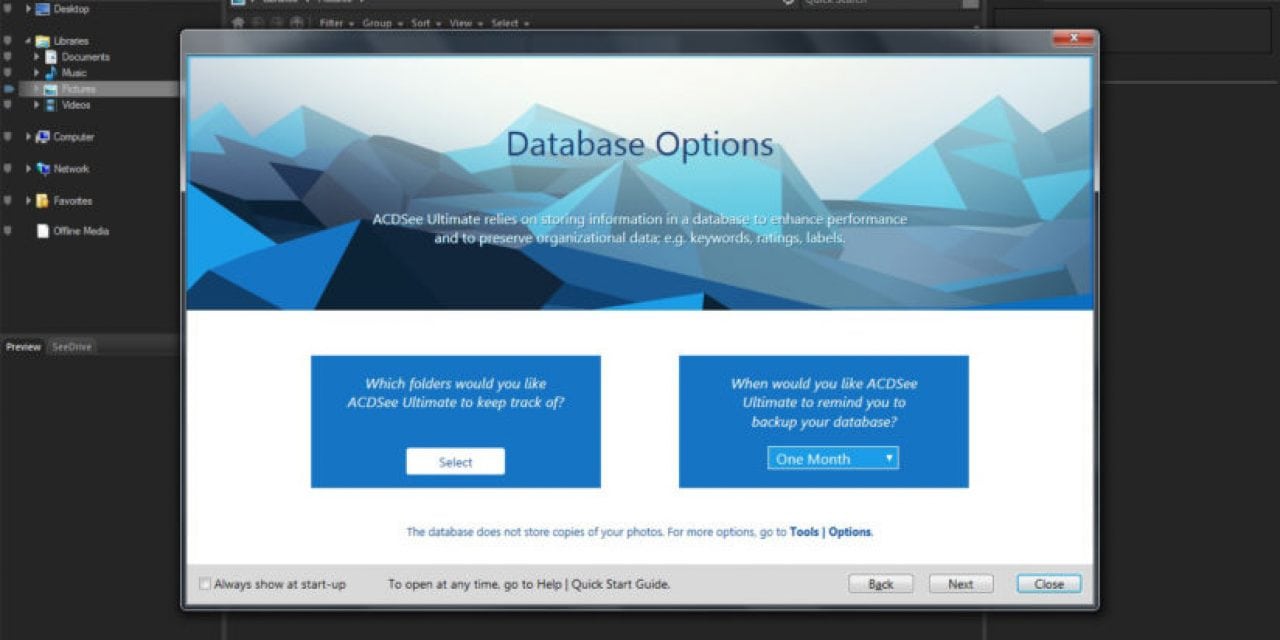
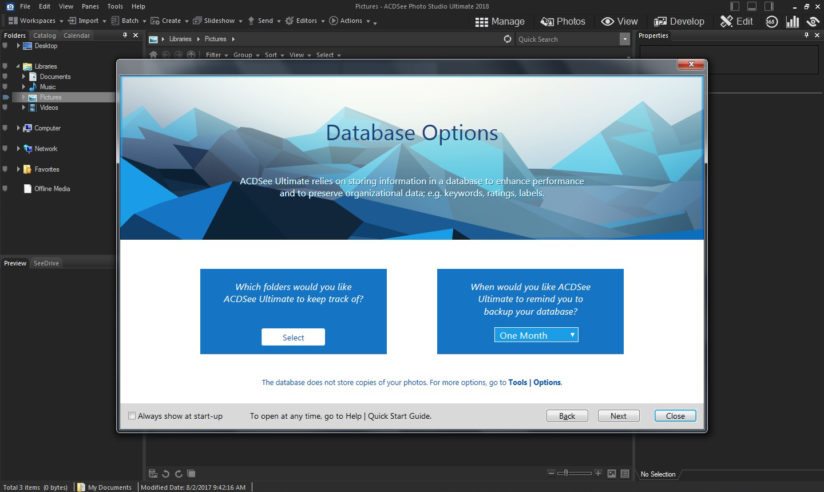
When you first launch Photo Studio Ultimate, you’re greeted with a quick tour of the software’s major features. The first thing you’ll do is tell the software which folders you’d like it to keep track of.
One great feature of Photo Studio Ultimate is that, unlike the recent trend with some photo processing solutions, you don’t have to import copies of your photos into an aggregated library file managed by the software. Instead, you are free to organize your photos in folders on your computer in a way that makes sense to you, and browse the images using the “Folders” pane at the top left of the Manage workspace.
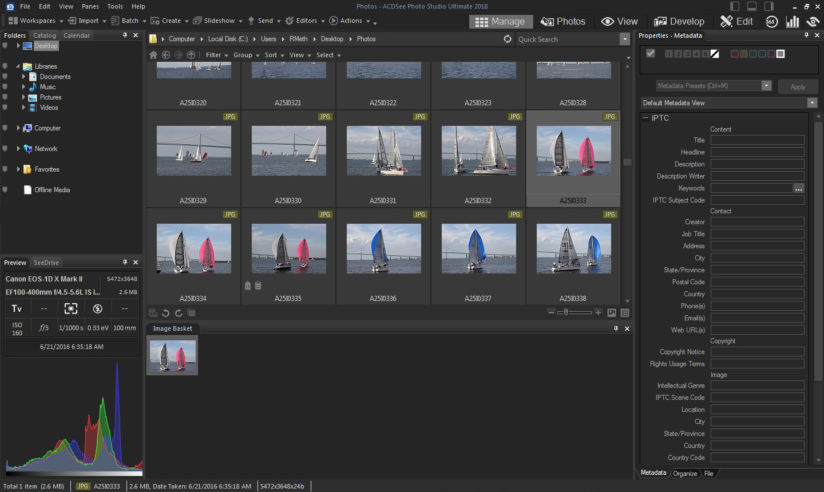
The Manage workspace is divide into three sections. In the center is a grid of thumbnails of all of the images in the folder you’re currently browsing.
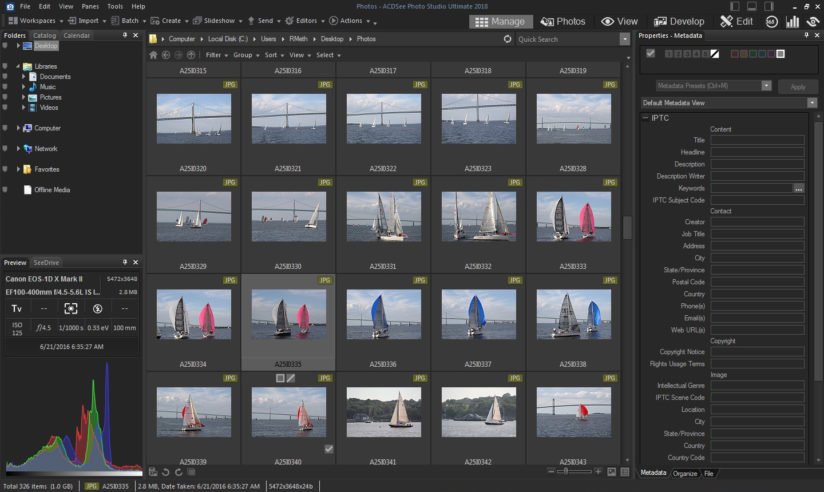
At left is a sidebar with two tabbed panes, which, by default, show the Folders pane at top, and the Preview pane at bottom. The Folders pane is a traditional file tree, which lets you browse folders on your computer intuitively. The Preview pane provides a snapshot of key data about the image currently selected in the thumbnail grid—info such as the make and model of the camera and lens used, file size and dimensions, exposure and metering modes, and the aperture, shutter speed and ISO settings, along with a histogram.
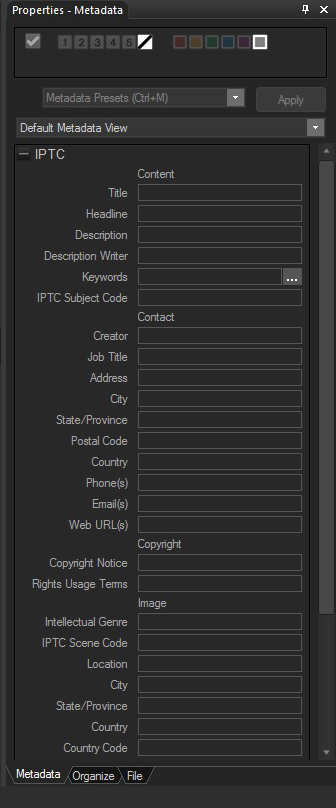
At right is a sidebar with three tabbed panes: Metadata, Organize, and File. The Metadata tab lets you quickly fill in IPTC information such as a title and description of the image, information about you as the photographer, and copyright assignment. You can save commonly-applied fields, such as your personal and copyright info, and apply them to future images easily, without needing to type everything again.
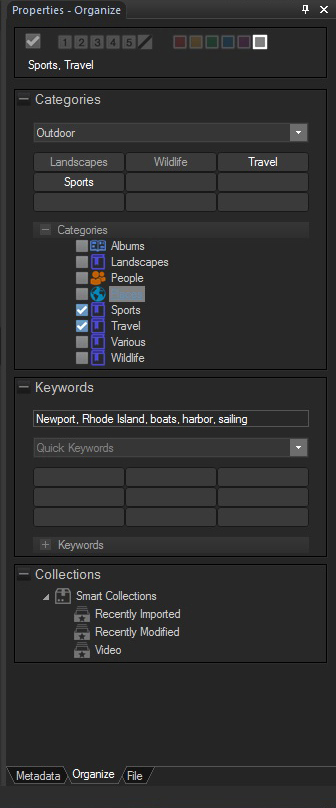
The Organize tab lets you apply categories and keywords to your photos to make them easy to find later. You can create custom sets of categories and keywords for those that you use often, helpful not only for speeding up the task of applying them, but also for keeping keywords consistent, which improves their usefulness. At the bottom of this tab is a Collections tree, which gives you direct access to photos that were recently imported or adjusted.
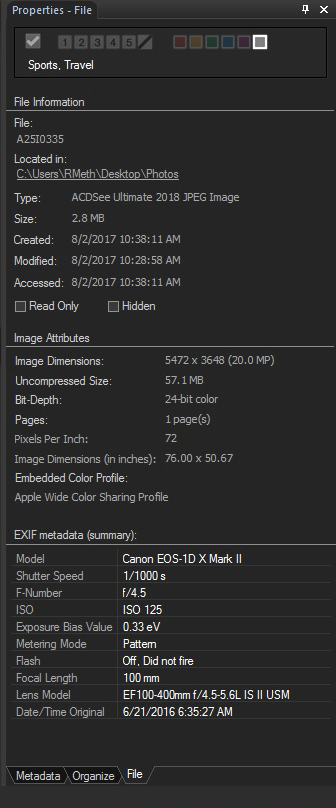
The File tab displays information about the selected file. Here you’ll find data including its storage location, size and file type, and EXIF data about the image’s exposure, as recorded by the camera.
A clever concept of Photo Studio Ultimate is the “Image Basket.” This is a collection of images, which you can create on the fly. One obvious use is to collect favorites as you review the photos from your most recent shoot. Once you add your first photo to the Image Basket, it appears in a new section below the main grid of image thumbnails.
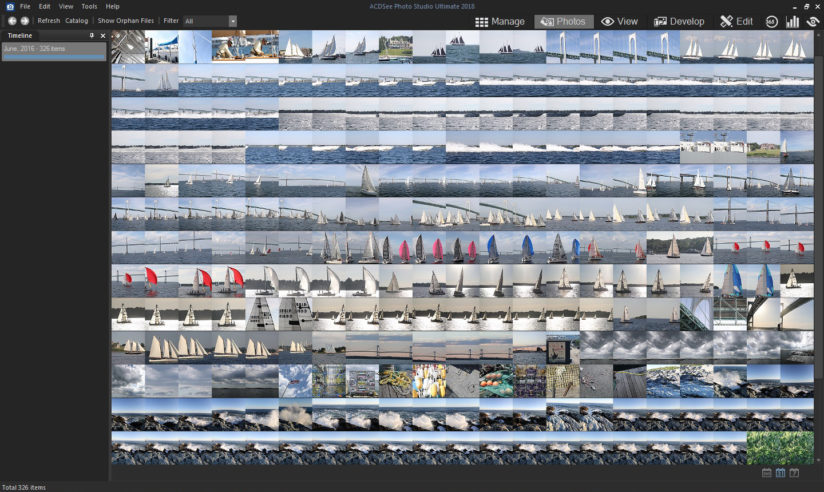
Photos Mode
In the age of smartphones, Photos mode will look familiar. It displays all of the images in your selected folder as a massive grid in chronological order. The advantage of this mode is that you can visually scan for an image very quickly, as screen space is maximized by removing borders and image titles from around each of the thumbnails. Double-clicking an image opens it in View mode.
View Mode
This mode is a more traditional presentation for image review. It features a large display of the currently selected image, with a scrolling chronological filmstrip below. To the right of the filmstrip is an Info palette that shows basic exposure and file data about the selected image.
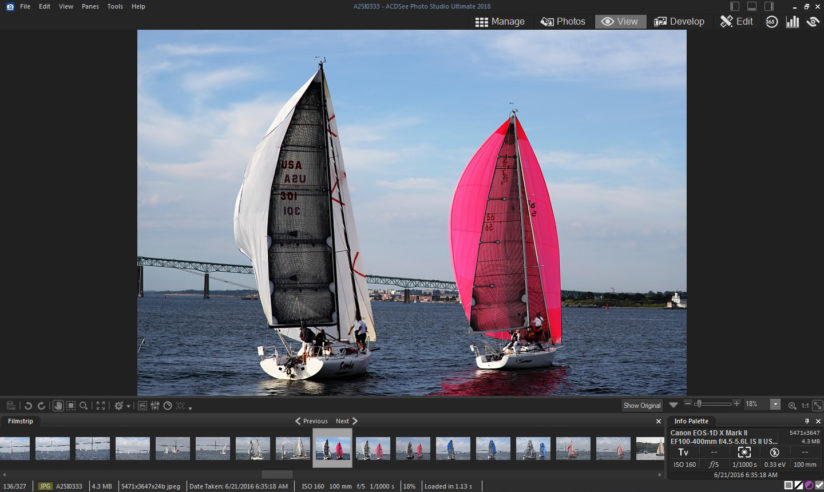
There’s also a toolbar between the image viewer and the filmstrip that includes buttons for quick access to commands, such as “Add to Image Basket” and basics like rotation, plus access to external editing software you may have installed on your computer, and to the Actions Browser.
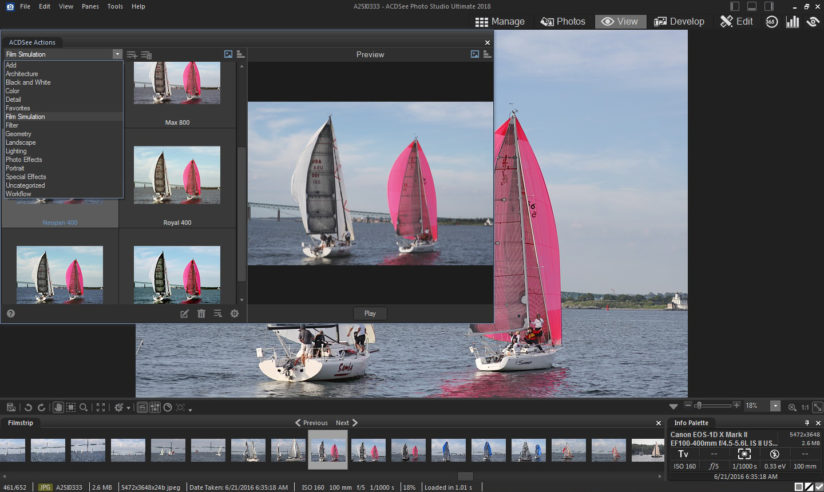
The Actions Browser displays a collection of preset effects that you can apply to your photos, which range from classic, darkroom-style adjustments to more whimsical and artistic effects. Here you’ll find options like one-click black-and-white conversions and actions that recreate the look of popular 35mm film types. You can also create your own actions for custom looks or to speed up corrections to a batch of images that need the same adjustments.
Develop Mode
Develop mode is where you’ll probably spend most of your time with Photo Studio Ultimate. Use this mode to apply non-destructive adjustments to your RAW and JPEG images. Because the adjustments are non-destructive, any changes you make in Develop mode can be altered later, even after you’ve saved and closed the photo.
The Develop tools are divided into four tabs: Tune, Detail, Geometry, and Repair.
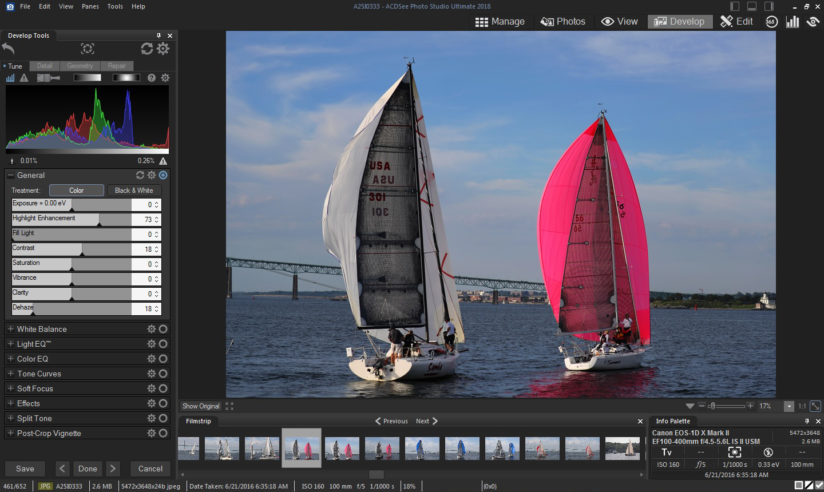
The Tune tab offers controls for global exposure and color. Here you’ll find sliders to adjust every aspect of your photo’s exposure. At the top of the tab is also a button to switch to black-and-white, which replaces the slider controls with those needed for monochrome adjustments.
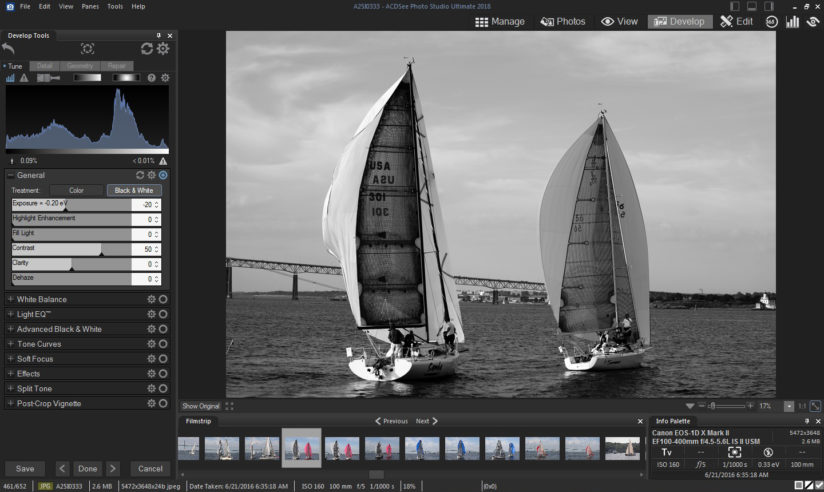
Again, all the adjustments in Develop mode are non-destructive, so you can feel free to approach image adjustments with a playful, creative attitude. If you change your mind later, you can always reset your adjustments and start over. You can also create “snapshots” at any stage of development and return to those states at any time.
In the Detail tab, you’ll find tools for sharpening, noise reduction, skin touch up, and chromatic correction. When you switch to the Detail tab, a small rectangle appears on your image, the contents of which are displayed at the top of the Detail tab, providing a 1:1 magnification of the area so that you can more closely inspect the effects of your adjustments. This is helpful to avoid over-sharpening, for example, which can result in “halos” and degradation of image quality. You can move this rectangle to any area of the image that you want to inspect.

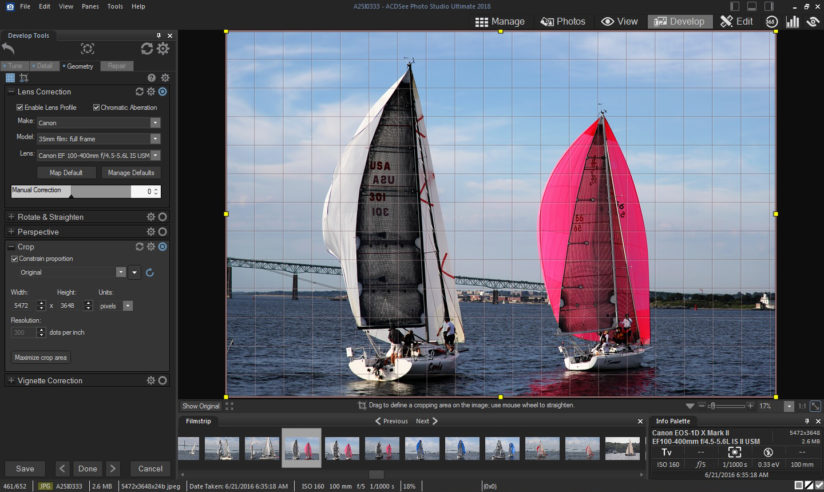
The Geometry tab contains tools for lens correction, perspective controls, cropping and rotation, and vignette correction. Select this tab and a grid overlay appears as a visual guide, which is useful when trying to straighten horizons or correct wide angle lens distortion of vertical lines. The Lens Correction tool has a large database of lenses, and if the file’s metadata matches a lens in the database, it’s automatically selected for you. If not, you can select your lens and camera combination from the dropdown menus. If your lens make and model isn’t in the database, there’s a slider control to make manual adjustments.
The Repair tab is where you’ll find Heal and Clone tools to make localized spot corrections, and a Red Eye Reduction tool. Both Heal and Clone can be adjusted via sliders to control the size of the brush and its feather (the hardness of its edge). Use the Clone tool when you want to copy exact pixels from one area of the photo to another. Choose the Heal tool when you want the software to analyze the source point and destination point to attempt to match lighting and color.

Edit Mode
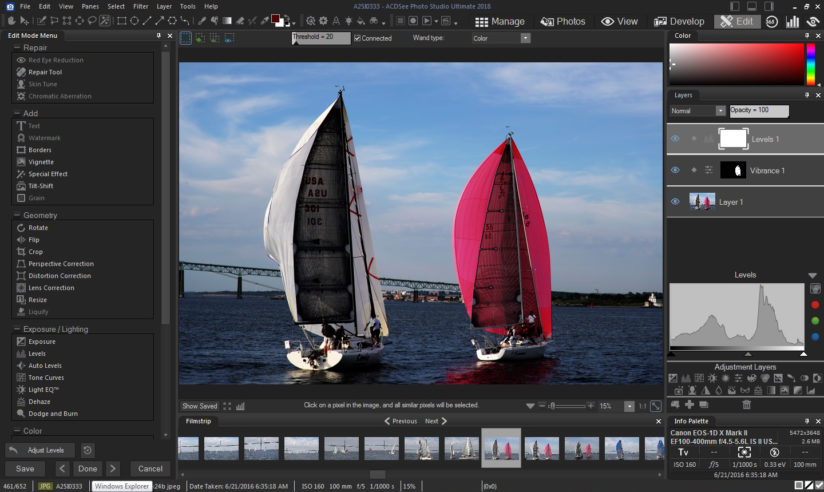
Edit mode is where you can add effects via adjustment layers, and have access to a variety of selection tools if you want to apply effects only to specific parts of an image. You can also adjust the opacity of each adjustment layer to fine-tune the strength of its effect.
In this example, a global Levels adjustment layer was applied to darken the image’s midtones, and a Vibrance adjustment layer, with only the pink sail selected, was applied to bring down the color saturation of the sail a bit.
Note that once you’ve added layers, you can’t go back to Develop mode unless you’re willing to flatten the image layers, which means you will no longer be able to adjust the effects of those layers. However, you can always save a copy of the image at this point in ACDC File Format. And most of the adjustments available in Develop mode are also available here in the left sidebar.
This is also the workspace where you’ll find tools to add text, watermarks, borders, vignettes, and more as finishing touches.
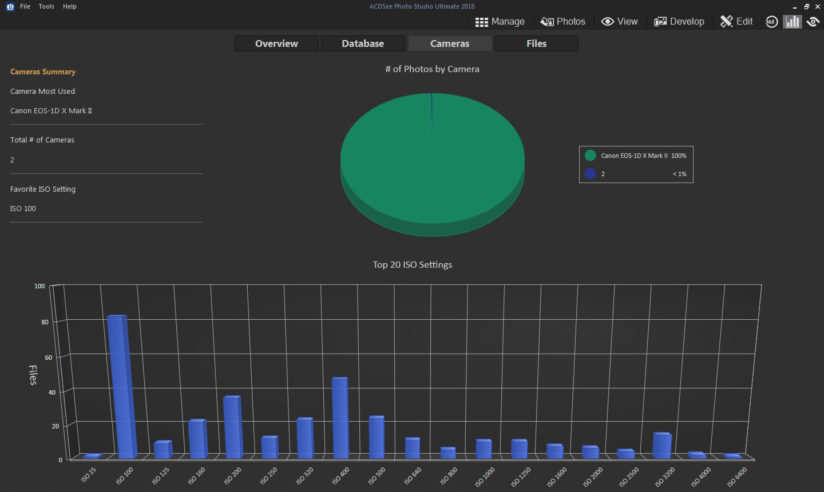
Dashboard Mode
The Dashboard provides statistics about your photo library, including insightful information, like the total number of images in your library, and stats, such as your most-used camera, file formats, and ISO settings.
A Complete Photography Workflow Solution
With its comprehensive collection of tools, ACDSee Photo Studio Ultimate 2018 combines the capabilities of several applications in one seamless experience, simplifying the process of organizing and perfecting your photographs. And, priced at just $149.99, it’s a terrific value too.
For video tutorials and more information about ACDSee Photo Studio Ultimate 2018, visit acdsee.com.
New Features In Acdsee Photo Studio Ultimate 2018
- Smart Erase. Remove unwanted objects and the Smart Erase tool will fill in the area naturally.
- Actions Browser. Record your editing process, categorize and manage recordings, and batch apply any of 125+ pre-loaded recordings to multiple images.
- Polygon Selection. Select around edges and irregular shapes with the Polygon Selection tool.
- Retouch portraits by moving pixels, not changing them.
- Keyboard Shortcuts. Whip through your process with hot keys available for every stage of your workflow.
- Grain Tool. Give your images an old, film grain look with the Grain tool.
- Mobile Sync. Jumpstart your process by wirelessly transferring photos from your phone to ACDSee with the ACDSee Mobile Sync app available for iPhone and Android.
- Improved Import. Avoid uploading the same old photos again and again with an import tool that remembers your previously imported photos.
- Pixel Targeting. Select and mask by targeting specific tones and colors within the image — even skin tones.
System Requirements
Hardware
- Intel® Pentium® 4 or AMD Athlon® 64 processor (2 GHz or faster)
- 2 GB RAM (6 GB RAM recommended)
- 512 MB Video RAM (VRAM)
- DirectX 10 compatible graphics adapter
- 1024 x 768 display resolution (1920 x 1080 recommended)
- 2GB of available hard disk space
Software
- Microsoft® Windows® 7 (SP1), Windows® 8, Windows® 8.1 & Windows® 10 (64-bit editions only)
- Microsoft® Internet Explorer® 9+
- Microsoft® DirectX® 10 or higher
- Windows Media® Player 9.0
The post ACDSee Photo Studio Ultimate 2018 appeared first on Outdoor Photographer.