The fall season always fascinates me. As a professional photographer, I use my home base of New England and the ability to make short trips at “peak” times to capture the colors. With this flexibility, I can stay at one place or move about the half-dozen states that are renown for this yearly display of Mother Nature. In this article, I’ll share with you the essential fall color photo tips that will put you on the path to making your own beautiful images of the season.
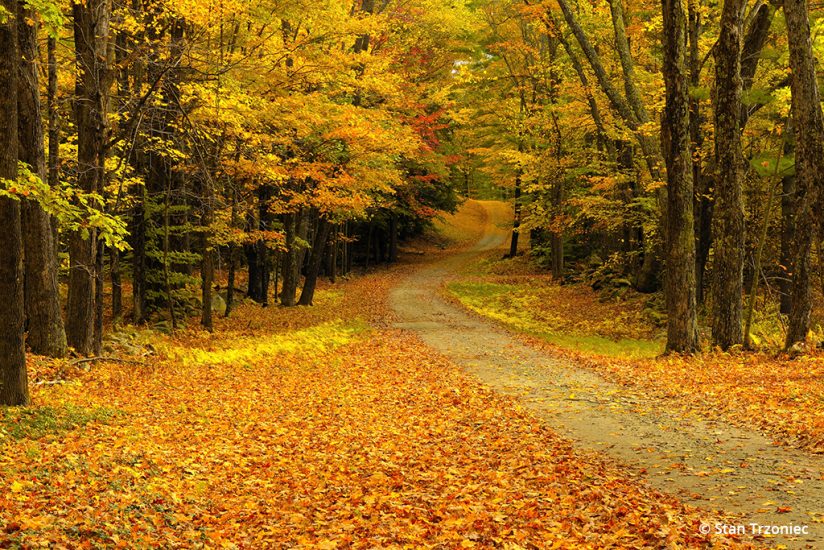
When you arrive at your destination, chances are you’ll be overwhelmed by what you see in front of you. Many photographers will argue that the first light is the best of the day. My take here is to stay out all day—the autumn season has more than enough color for me to photograph, especially on a bright fall day, and as the sun moves, the opportunities in the landscape keep changing from sunrise to sunset. You can experiment with side-lighting or backlighting for some impressive results. Out west, the aspens absolutely light up with this type of illumination. In my part of the country, New England, the red maples combined with darker pines always are worth a second look. We get days with brilliant blue skies accented with large, cumulus clouds.
Take Advantage Of Nature’s Soft Box
An overcast day is the best lighting you can have for fall color photography. Mother Nature provides us with a giant diffuser to soften the light while at the same time allowing the colors to come through with a soft saturation not possible with bright sunlight. Colors pop at any angle without the annoying shadows. I like the depth of color on an overcast day, and welcome the occasion to go outside and look for patches of patterns in the trees and the groundcover. To add to the mix, a light drizzle can boost the saturation, and with a polarizer you can get rid of distracting reflections. When shooting on a cloudy, overcast day, try to leave the sky out of the photo by composing tightly on the subject. With no color to speak of, a gray sky is seldom an asset to a radiant color photograph.
Think About More Than Just The Colors
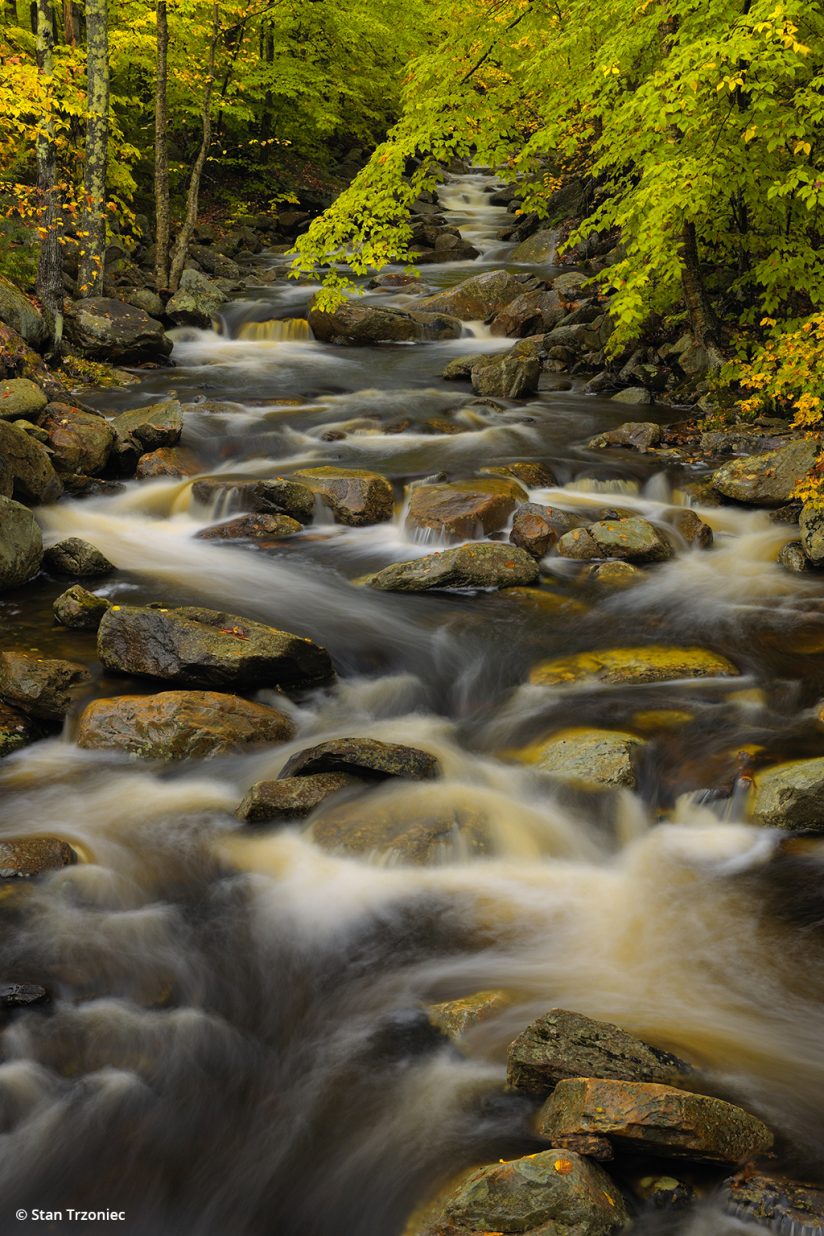
Fall is a good time to set your goal on a project, self-assignment or a favored location. Having published a book on the season, I am always on the hunt for new locations to add to this tome. Waterfalls and rolling streams are prime targets, especially on overcast days. Use a good, sturdy tripod and a cable release, and employ the slowest shutter speed you can, stopping the lens down to ƒ/16 or ƒ/22. On a sunny day, I use a Singh-Ray Vari-ND filter that dials in any density up to eight stops of light to allow longer shutter speeds that blur the motion of the falls. On a dreary day, I often don’t even need the Vari-ND filter. I simply set my camera’s ISO to 50 or 100 and use a polarizer to control the light coming into the camera.

Equipment & Lens Choices For Fall Color
For capturing a vast expanse of color, wide-angle lenses are a natural. A 24-70mm is perfect for the job. For shooting up and into the trees, wider lenses offer a unique perspective, and for shooting down to include both the groundcover and trees, they’re ideal for scenes where you want sharpness to extend from inches to infinity. With a wide angle, I can draw attention to a colorful palette in the foreground, or I can place something else in the foreground and make use of the vibrant colors in the background.
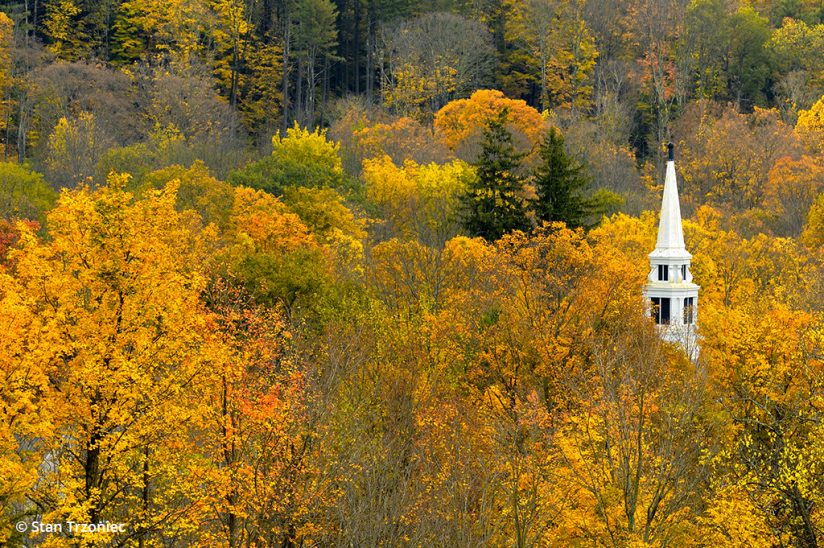
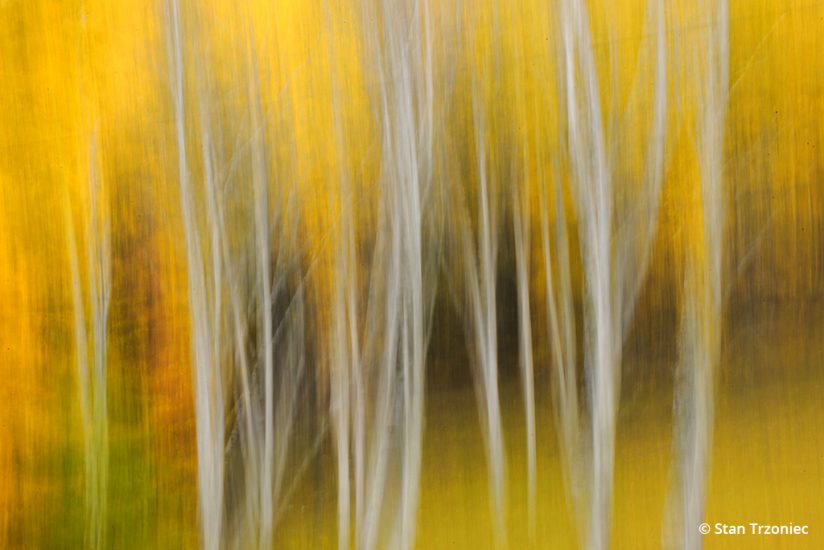
Telephoto lenses, on the other hand, can help isolate parts of a colorful forest into interesting shapes and colors, thanks to the depth-flattening effect of the longer focal length. Again, use a sturdy tripod and a cable release, and, if you’re shooting with a DSLR, use live mode to raise the mirror before the shutter goes off for blur-free photographs. Telephoto zooms offer the convenience of staying in one place while you play with composing the forms, patterns and colors in front of you. However, don’t let this versatility lead to complacency; make sure you move around and look for new perspectives.
I always take along a true macro lens, as lulls in the day’s shooting can be heightened by stretching out the legs of the tripod, getting down and dirty on the ground and exploring for fallen leaves, acorns or patterns formed by a combination of both. Or you can use close-up attachments for occasions when the added weight of a dedicated macro lens may not be desirable. I use a Canon close-up attachment with a 77mm diameter on my Nikon 70-200mm lens to make a useful zoom macro. For dedicated macro work, I like to use a right-angle finder, or, if your camera has one, a swiveling LCD is incredibly convenient.
Use Lighting To Boost Color
When the available light isn’t ideal, today’s TTL flashes are easy and accurate to use. I like to cut back the power to add just a bit of fill without overpowering the scene. I find that if I dial back about a 2⁄3-stop on the flash, the subject gains a feeling of luminance without being overpowering. Lightweight LED panels are also incredibly useful because you can see the effect as you shoot.
Another solution is to carry a handheld reflector that folds to a compact size to fit easily into your camera bag. Additionally, consider a visit to your local glass shop, where you can often purchase “scrap” mirrors, and, for a few dollars more, they may polish the edges and round the corners for you. These can be used as reflectors to add light to a scene.
Use A Tripod, But Don’t Get Stuck
Purchase the best tripod you can afford and be aware that long center columns that make for unsteady support if the wind comes up. There are plenty of excellent models that are lightweight and sturdy and for trekking. I am using a Gitzo GT2542L with an Acratech quick-release ballhead that allows precise adjustments with one knob (as opposed to three on other tripod heads).
When I’m photographing a colorful fall scene, I like to mount the camera last, not first. I move around looking through the viewfinder, often changing lenses to find the right composition. Then I pull out the tripod and get everything locked down. Attaching the camera first just plants the initial idea into your head that this is the only place to be. Keeping an open mind before settling down is important. After getting a shot you like, remove the camera from the tripod and keep looking, repeating the process. A great fall color scene seldom has only one photo opportunity.
Be Familiar With Your Equipment
Out in the field, I see more and more photographers with the latest high-tech cameras. This is great, as long as you are familiar with the workings of your new gear before you leave. Especially when on a workshop or cross-country trip with a short season, bring and use the tools that you are most familiar with, plugging in the newer gear as time permits. You will find yourself less stressed and get better images. You can thank me later!
See more of Stan Trzoniec’s work at outdoorphotographics.com.
The post Classic Fall Color Photo Tips appeared first on Outdoor Photographer.