The very first enlargement I ever made was in black and white. I’ll never forget that moment as I watched the image slowly reveal its tones of gray, white and black as I swished the developer in a red 11×14 plastic tray. (How many of you are smiling right now because you have the same memory?) The magic, amazement, science, befuddlement and excitement of the moment was running through my mind for 90 seconds as it developed. I gingerly used a pair of bamboo tongs with rubber grippers to grab the print from its home. I suspended it in air for 15 seconds as I let the developing solution drip back into the tray and then slowly slipped it into the stop bath. There it lived for another 30 seconds. I grabbed a different pair of tongs, let the excess fluid drip from the surface and gently laid the print into the fixing solution. I had to leave it for three minutes before I could bring it into the light and study what I had created. It seemed like hours. The timer went off and, using a third pair of tongs, I let the hypo drip from the print. I placed it into a fourth empty tray, and with anticipation, I brought the print into the light. Yes, it was magic. From that moment, I was hooked.
I’ll always have a special place in my heart for black and white as I spent many a day and night listening to great music, inserting negatives into the enlarger, exposing prints and repeating the process. I graduated from 8x10s to 11x14s and wow, what a difference. Time went on, and I progressed to 16x20s. Man, was I ever nervous making my first “Big Boy” enlargement. I worked on test strip after test strip to make sure that when I placed that big boy piece of photo paper under the enlarger, it was going to work.
Then, digital photography came upon the scene, and I broke down my darkroom. Being nostalgic, I still have all my gear in the crawl space of my basement, and I’ll never get rid of it. But I still thirst to make black-and-white images. If you have the same craving, fire up Photoshop and apply the tips below. Being a devoted darkroom inhabitant, I’m reluctant to admit it, but the tools in Photoshop make it very, very easy to turn out top quality black and whites.
Click on the B&W Adjustment layer in Photoshop and the screenshot you see below will appear. What needs to be done is straightforward and, combined with a few Levels or Curves adjustments, gorgeous images will be produced.
The B&W adjustment layer can be accessed in one of two ways:
- Along the options bar at the top of the Photoshop workspace, go to IMAGE>ADJUSTMENTS>B&W.
- At the bottom of the layers palette, click on the half-white, half-black circle and scroll down to Black and White.
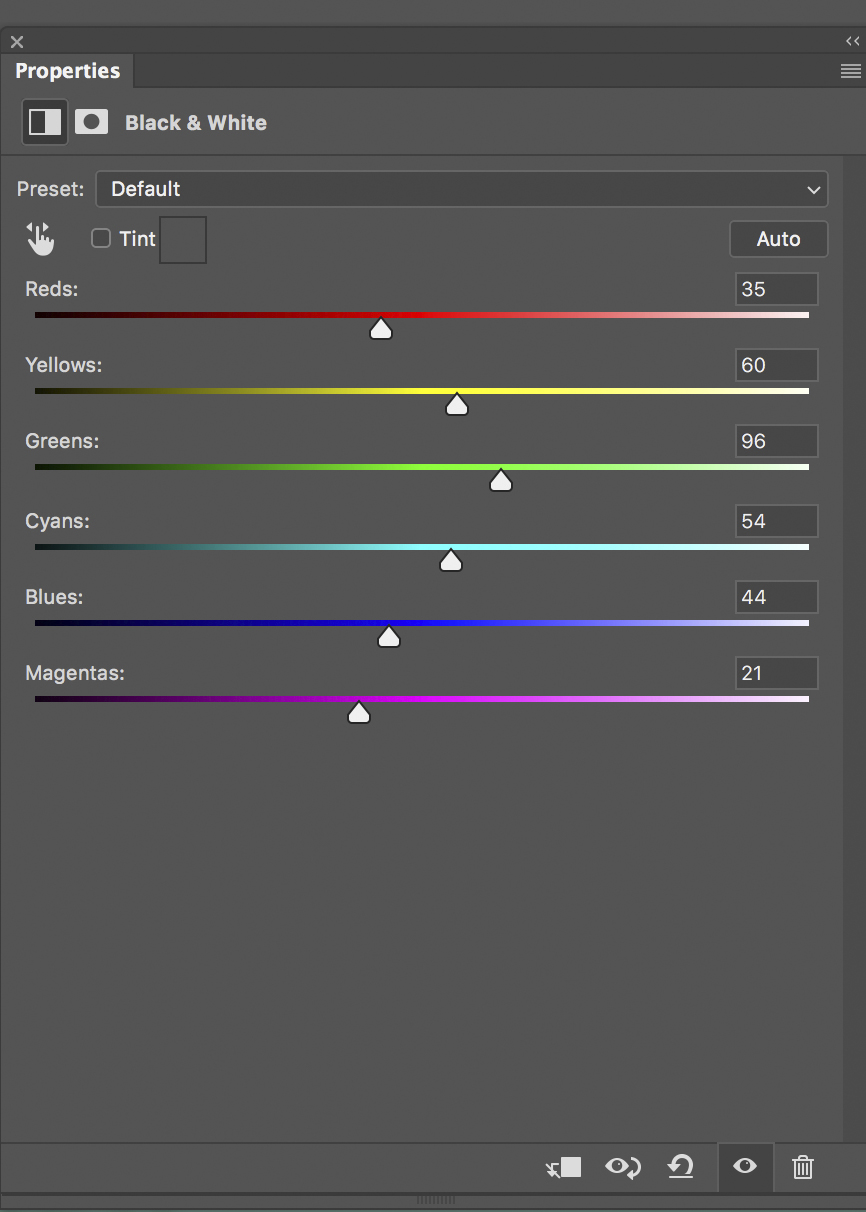
Using either method to access the adjustment layer, the B&W panel appears. In the Preset drop-down option box, leave it at DEFAULT unless you want to apply a color filter. What a color filter does to the tones in a black and white is beyond the scope of this week’s tip. You can use the Scrubby slider (the pointed finger with arrows on either side) to adjust the brightness values of each color, but for the sake of simplicity, concentrate on the six color slider arrows to make all your adjustments.
The way the sliders work is straightforward. Each color relates to the existing color that lives in the original version of the photo. For instance, if you move the slider under the red bar to the right, any color in the original that contains a red value will be brightened. Conversely, if you move that slider to the left, any color in the original that contains a red value will be darkened. It doesn’t get much easier than that. The next color down is yellow. Move the yellow slider to the right to brighten any yellows and to the left to darken them. Continue using each slider until you adjust them all. If you don’t see any changes, it means that the color in the original that relates to the slider you’re adjusting doesn’t exist in the original image.
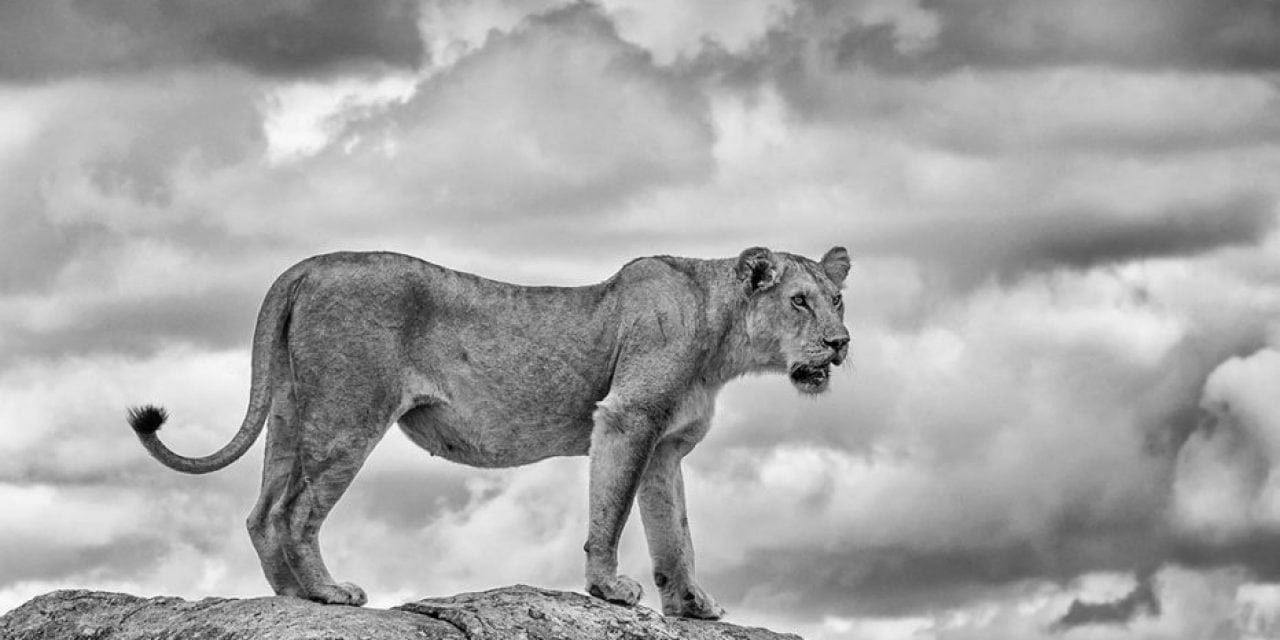
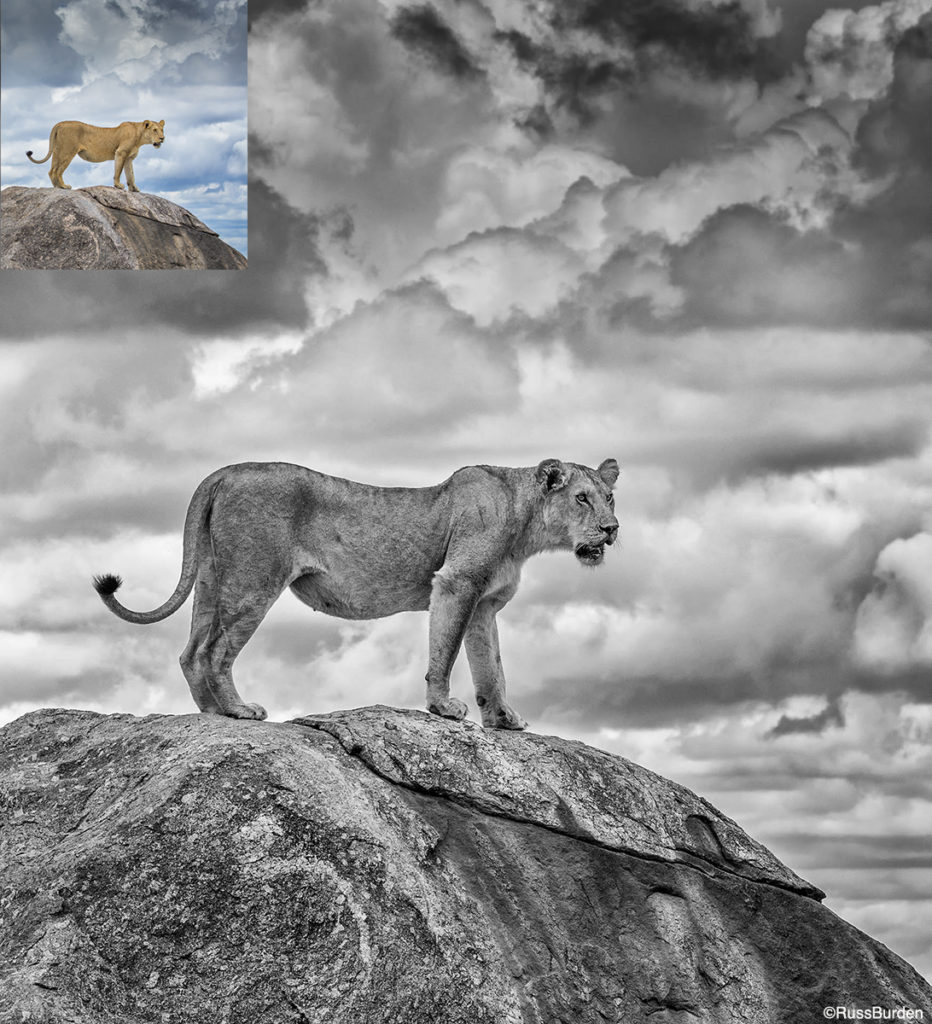
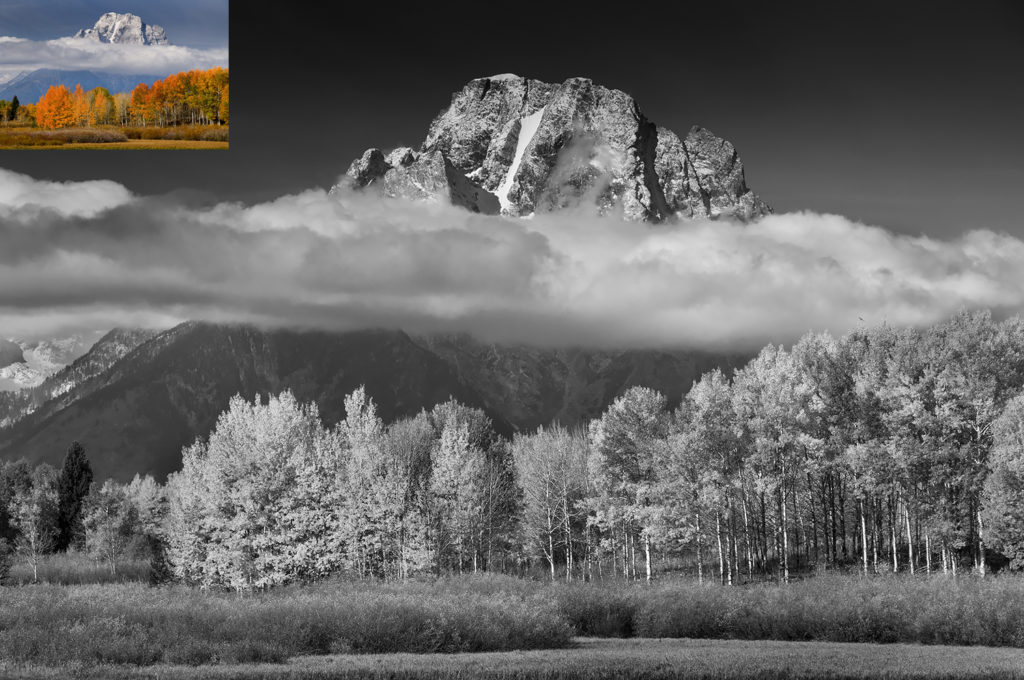
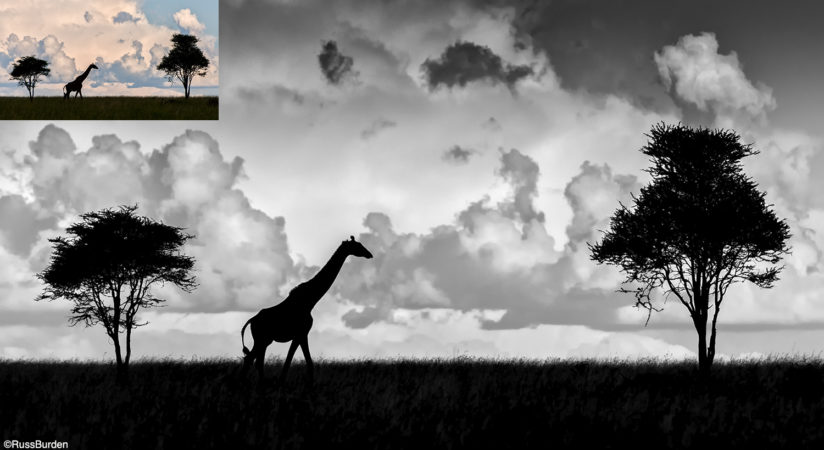
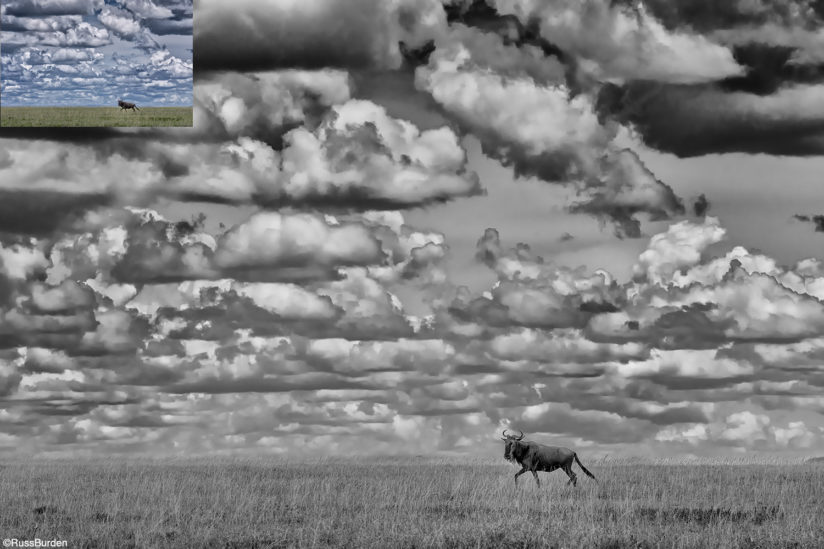
If you’re just getting started using the B&W Adjustment Layer or never worked in a black-and-white darkroom, know that images with lots of clouds and interesting skies are great candidates on which to experiment. Dive into your color files and look for photos that contain dramatic skies and use them to get started using the B&W adjustment layer. Once you get immersed into the medium, when you convert an image to black and white and it makes you smile, you’ll frequently think, Color Be Gone.
Visit www.russburdenphotography.com for information about his nature photography tours and safari to Tanzania.
The post Color Be Gone appeared first on Outdoor Photographer.