In our previous article on ACDSee Photo Studio Ultimate 2018, we took an overview of each of the software’s Modes to get a feel for the total photography workflow and RAW processing solution that this application provides. If you haven’t read that article yet, you might want to start there, as it will get you up to speed on the wide range of capabilities and features of this end-to-end photography workflow application.
In this article, we’ll look more specifically at a few of the features we find particularly useful for quickly handling common corrections and adjustments, and also highlight other noteworthy new features in the latest edition of the software.
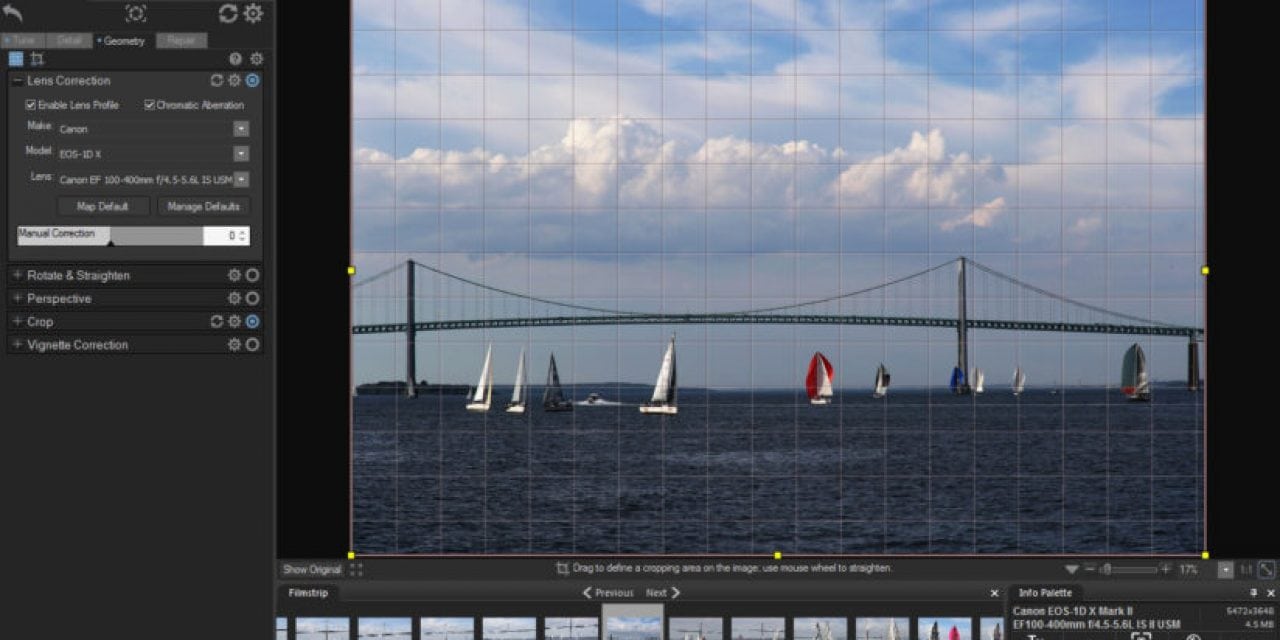
Lens Correction In Photo Studio Ultimate
Each lens in your camera bag has its own unique optical characteristics—some of which you may want to correct. Wide-angle lenses, for example, can produce perspective distortion. Photo Studio Ultimate’s Lens Correction tool can automatically fix issues like vignetting, distortion and chromatic aberration.
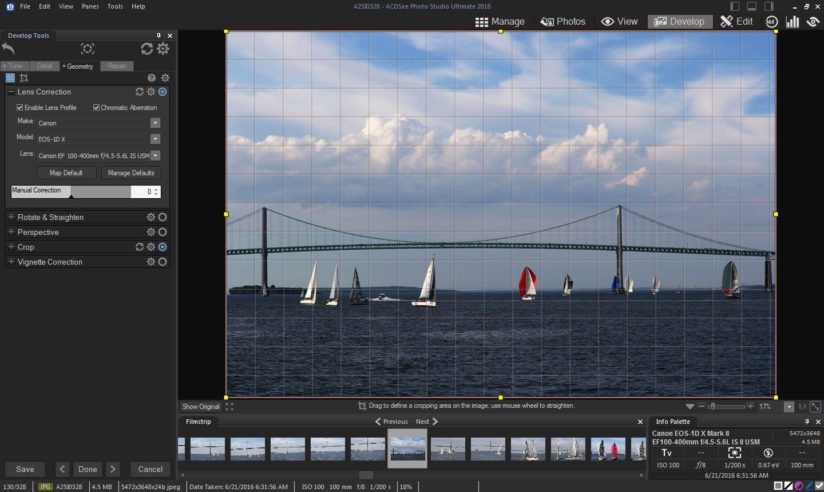
You’ll find the Lens Correction tool in the Geometry tab of the Develop Mode workspace. Here you’ll see dropdown menus to select the make and model of the camera you used, as well as your lens. If your camera and lens combination has been profiled—and the chances are good that they have with most current cameras and lenses—simply select them in the dropdown menus and Photo Studio Ultimate will automatically correct the lens’s known aberrations. The process may be a simple as this single step.
If your camera and lens combination aren’t available in the menus, or if you want to make further corrections, you’ll find slider controls here in the Geometry tab to rotate and crop, straighten, correct perspective and remove vignetting.
Smart Erase
Sometimes an unwanted element detracts from your photograph. Smart Erase enables you to quickly remove it with a stroke of a brush, automatically replacing the object with a matching background.
You’ll find the Smart Erase brush in the tool palette at the top of the Edit Mode workspace. Select it, and adjust your brush size appropriately for the object you want to remove, then simply brush over the object and Smart Erase does the rest. It may take a few strokes and some practice to get ideal results, and Smart Erase does work best with cleaner, uncluttered backgrounds.
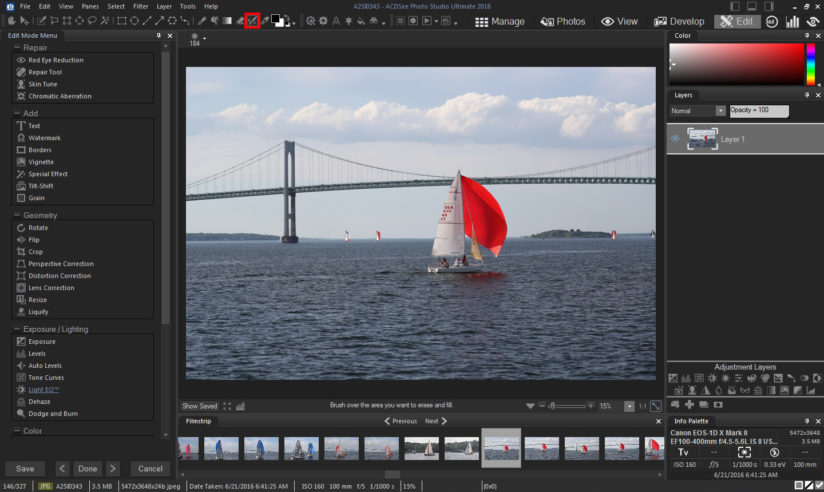


For more precise control over object removal, you can also use the Repair tool, which offers both cloning and healing options. The Clone tool is best when you want to directly copy pixels from one area of the image to another. Use the Heal tool when you are trying to match the source point to the destination point’s color and lighting.
Check out this tutorial video for a more in-depth look at using the Smart Erase tool.
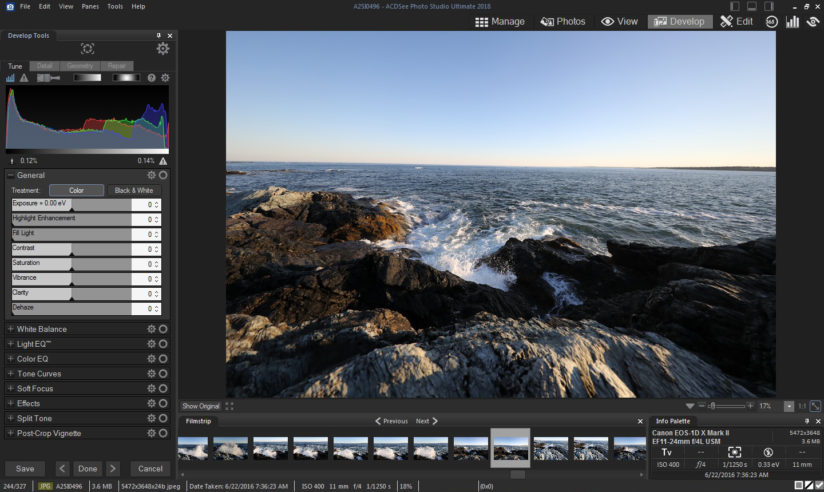
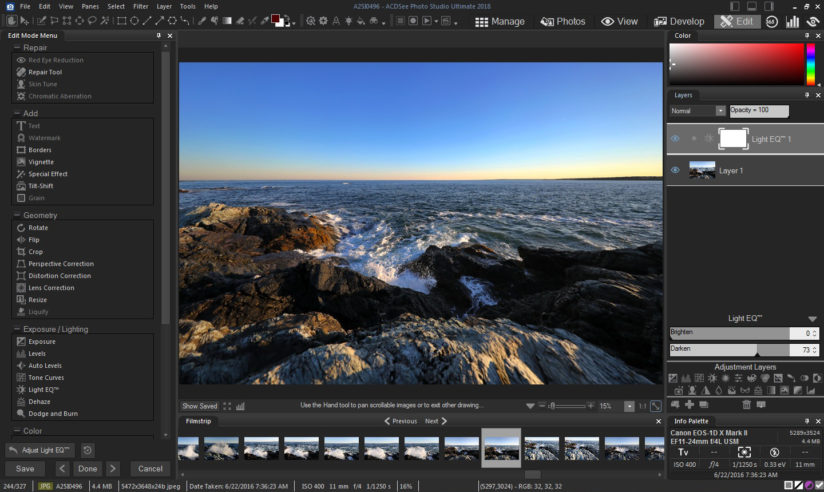
Light EQ
Often in landscape photography, we’re presented with a scene that exceeds the dynamic range of our camera’s sensor. We make the best exposure we can, avoiding blown-out highlights and blocky shadows as much as possible. Then we try to balance the extremes in post-processing. Photo Studio Ultimate’s Light EQ tool, which can be applied as an Adjustment Layer, can make this a very quick process.
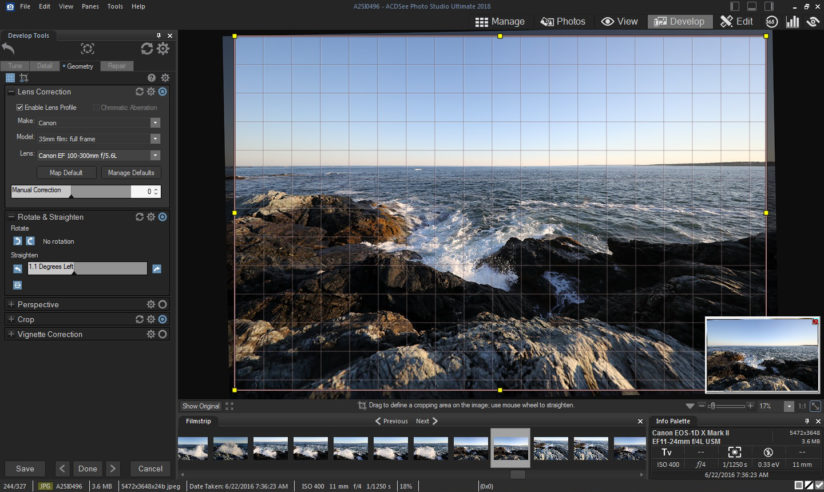
In this example image, we started in the Develop Mode, Geometry tab, and used the Rotate & Straighten tool to fix a slanting horizon. This is something to keep an eye on when you’re shooting, and definitely something to correct “in post” if it’s off—unless you’re going for a specific creative effect, a level horizon line makes a much stronger composition.
Next, we wanted to balance the foreground exposure with the background. The sky was too bright compared to the foreground. We applied a Light EQ Adjustment Layer and used the Darken slider to automatically dial down the overly-bright sky. This tool is intelligent, and analyzes the scene so as not to affect areas where the adjustment isn’t needed. With just a few simple steps, we fixed the biggest problems with the image in under two minutes.
More Noteworthy New Features In Photo Studio Ultimate 2018
In addition to those features we’ve highlighted above, there are several others worth noting. One is the Actions Browser, which includes more than 125 pre-recorded actions that you can apply to a single image or to batches of images at once. These include black-and-white conversions, classic film type looks and artistic effects fine-tuned for specific subjects such as landscapes and architecture. But perhaps the best feature of the Actions Browser is that you can record your own actions. This is incredibly useful when you need to apply identical corrections to multiple images from a series.
This video provides an overview of the Action Browser and shows you how to record your own.
While we don’t recommend the Liquify tool for your natural history and documentary photos, experiment with it when you’re in a playful mood. Found in the Edit Mode workspace, Liquify lets you shift, pinch and bulge pixels, moving them around to create distortions for artistic effect. This video demonstrates its capabilities.
The Chromatic Aberration tool fixes what’s also known as “color fringing” a result of lens imperfections that can occur in high-contrast areas of an image. In addition to the automatic correction available in the Lens Correction tool, there are also manual sliders available to make customized adjustments in both the Develop and Edit Mode workspaces. This video shows how.
Finally, for those photographers who shoot portraits as well as landscapes, Frequency Separation is a powerful tool for retouching skin imperfections without resulting an unnatural, over-processed look. It works by creating high-pass and low-pass layers from your original image, allowing you to retouch texture and hue independently. See how it works in this video.
These are just a few the many advanced filters and corrections available in ACDSee Photo Studio Ultimate 2018. Priced at just $149.99, this comprehensive photography solution for Windows handles everything from importing and organizing your photos to perfecting them for printing and sharing. For more information, visit acdsee.com.
The post Photo Studio Ultimate Favorite Features appeared first on Outdoor Photographer.