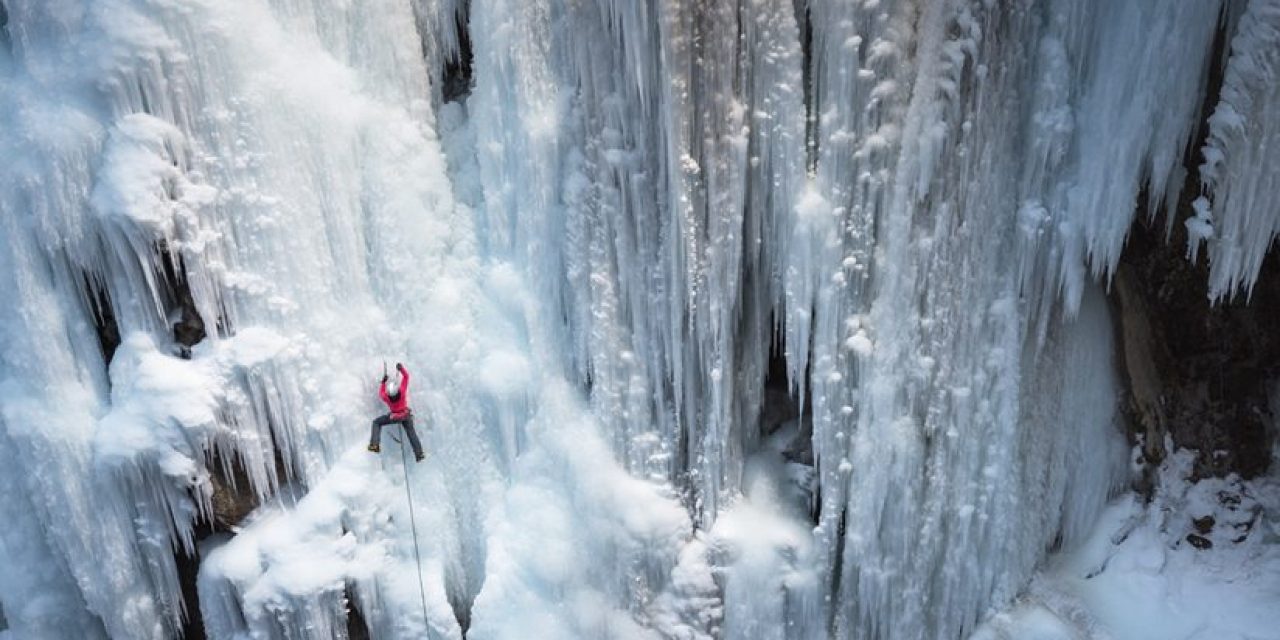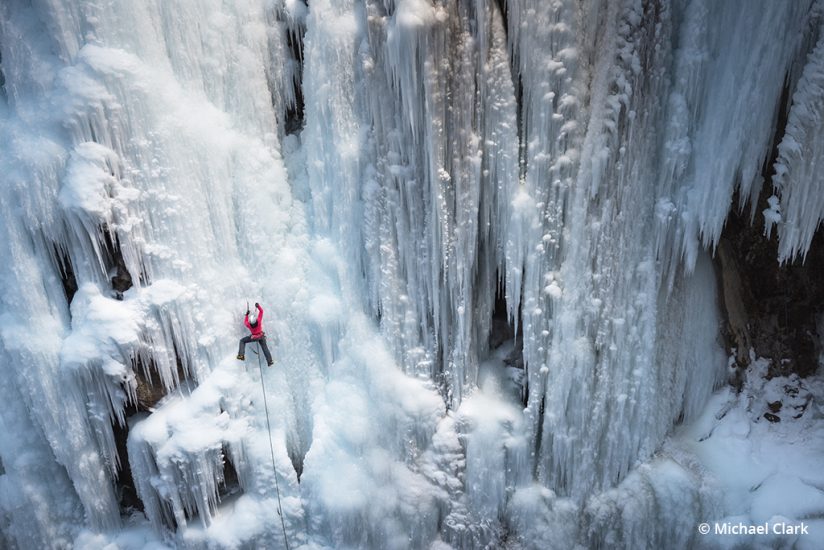
Nikon D800, AF-S NIKKOR 24-70mm F2.8G ED at 40mm, Gitzo tripod. Exposure: 1/40 sec., ƒ/5.6, ISO 100.
As far as photography genres go, adventure sports photography is fairly new. While this genre is an outgrowth of expedition photography—explorers have documented expeditions using photography since the early 1900s—adventure sports photography as we know it today has only really been around since the early 1970s. By adventure sports, I mean sports like rock climbing, mountain biking, surfing, skiing, snowboarding, B.A.S.E. jumping and whitewater kayaking, to name a few.
What qualifies as an “adventure” is debatable, but for this article, we will define it as an activity with an unknown outcome involving risk. Hence, even if you are creating images of other types of adventures that are not adventure sports, many of the tips and techniques discussed in this article will still apply.
Get To Know The Sport
For the most part, the best adventure sports photographers working today all started out as participants in the sports they went on to document. To do justice to these adventure sports, as with all sports photography, an intimate understanding of the sport is critical, not just to capture amazing images but also for your own safety and for the safety of everyone involved. I began as a climber before I began capturing images of rock climbers, ice climbers and mountaineers. In that vertiginous environment, knowing how to move around and position yourself, as well as how to stay out of the way of the climbers you are photographing, is particularly important.
Knowledge of the sport and being able to predict what will happen is key to capturing the height of the action as well as the in-between moments that help tell the story. My advice is to start out with sports you know and participate in. If you want to photograph a sport you don’t know that well and don’t participate in, I would suggest that at the very least you try it out for yourself and learn as much as possible.
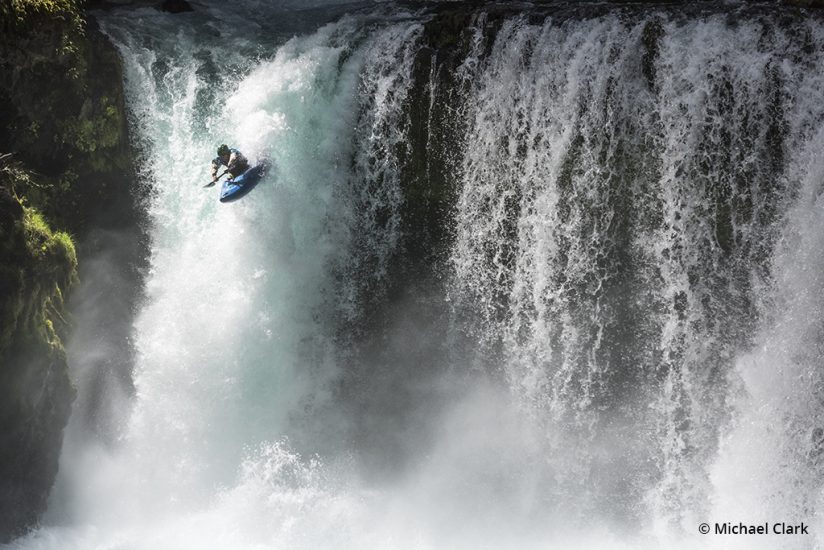
Nikon D810, AF-S NIKKOR 70-200mm f/2.8G ED VR II at 105mm, two Elinchrom ELB 1200 battery-powered Hi-Sync strobes triggered remotely with a transmitter. Exposure: 1/2500 sec., ƒ/5.6, ISO 800.
Be Comfortable On Location
For readers of Outdoor Photographer, this probably goes without saying, but pretty much all adventure sports photography happens in the outdoors, and how comfortable you are in the environment in which the sport takes place will have a big impact on the images you are able to produce. A good all-around knowledge base of camping, backpacking and outdoor etiquette will serve you well no matter what sport you are capturing.
Being comfortable enough to capture the image is more than just being experienced in the outdoors; it also means being prepared with warm clothing, sunscreen, the right shoes and all the little things that allow us to stay out for extended periods. Early on in my career, I learned this lesson quickly. Years ago, on an assignment for Climbing magazine, I was standing up in a steep couloir photographing rock climbers, and I underestimated how cold it was going to be. I had a big down jacket with me, but it wasn’t enough. My whole body was shaking so violently from the cold that I could barely make any images at all. When I got back from that assignment, I purchased an even warmer down jacket, and I take extra clothing on every assignment to make sure I can stay comfortable no matter what the situation.
Be Able To Take Care Of Yourself
Anyone wanting to capture adventure sports is going out with athletes who will be pushing themselves. Hence, the photographer will have to be able to get to the location safely and be safe in that environment. A big part of capturing adventure sports images is being physically fit enough to be out there. For many sports, I have to carry a giant backpack filled with gear, and on top of that I have to carry whatever camera gear I need for the shoot as well. In terms of rock climbing, this can easily be a 60- to 80-pound backpack filled with ropes, climbing hardware, food and water, and a camera with a few lenses. For other sports, it isn’t quite that intense, but in every case I typically have a larger backpack than the athletes I am photographing.
Taking care of yourself also means hydrating and fueling up so that you can hang with the group. And unless you want a bunch of butt shots, staying ahead of the group is critical. Surf photography in particular is one of those sports where you really have to watch out for yourself when swimming under wave after wave and trying to stay out of the way of the surfers but still get the shot. Surfing, rock climbing and skiing or snowboarding might be the three toughest adventure sports to capture because the photographer is in the mix, so to speak, while documenting it.
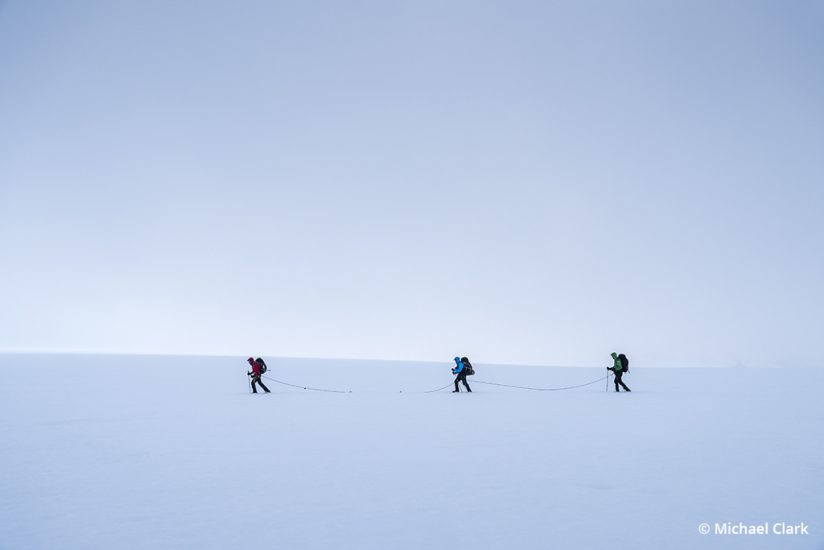
Nikon D810, AF-S NIKKOR 24-120mm f/4G ED VR at 35mm. Exposure: 1/2500 sec., ƒ/5.6, ISO 400.
Be Prepared To Sweat
There seems to be a direct correlation between how much I sweat and the quality of the images I come back with from an adventure sports photography assignment. You’ll notice that so far in these tips, I haven’t even talked about photography, really. That is because the photography is the easy part of capturing adventure sports. Getting out there, into position and set up for the shot is usually much harder than actually getting the shot.
High Frame Rates & Timing
As with most sports photography, often the action is happening so fast that it is hard to follow it, much less capture it. This is where a camera capable of high-speed continuous shooting can be very useful. I generally recommend that sports photographers seek out a camera system that can blast away at 5 fps minimum. A camera that can generate 8 to 12 fps—or faster—is even better.
Of course, just because your camera can record at an obscene frame rate doesn’t mean you are guaranteed to get the image you want. Sometimes going old school and using your own timing to trigger the camera can be more effective—that is, if you can push the button at just the right time. The good news is that even if this is tough at first to pull off, with practice you will get much, much better.
Another consideration here is the shutter lag associated with the camera. Every camera has a shutter lag, but the good ones have such a miniscule shutter lag that for all intents and purposes it is instantaneous. Camera performance matters in adventure sports photography because you are pushing the envelope of what is possible.
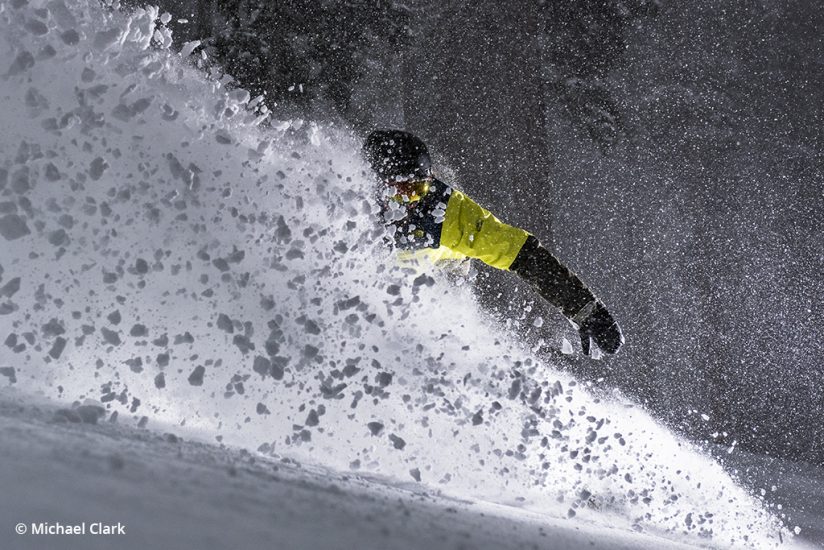
Nikon D810, AF-S NIKKOR 24-70mm F2.8G ED at 62mm, two Elinchrom ELB 400 battery-powered Hi-Sync strobes triggered remotely with a transmitter. Exposure: 1/6400 sec., ƒ/5, ISO 250.
Autofocus Speed
A camera with fast, precise autofocus is also important when trying to document fast-paced adventure sports. There is a very good reason that professional sports photographers use the latest and greatest cameras: they usually have the best autofocus systems that can accurately track the subject no matter how it is moving. High-end pro camera models typically have the best and most accurate continuous autofocus and the highest frame rates. This isn’t to say that you can’t create amazing images with lesser cameras, but having the best technology helps a lot.
In terms of how I generally have the autofocus set up, on my Nikons I use the AF-C (continuous AF) settings in the 3D Tracking AF mode or the Group AF mode. I also generally use back button autofocus, which separates the initiation of the AF and the shutter release. Check your user manual to see how you can set this up. Most camera brands have a back button autofocus option. By using back button AF, it allows me to really separate the AF from the timing of the shot, allowing me to concentrate on the timing.
Hyperfocal Settings
In some situations, I turn off the autofocus altogether and use hyperfocal settings in manual focus mode. To set this up, check out the top of your fixed focal length lenses. Most fixed focal length lenses will have a series of numbers and lines on the top of the lens, just under the focus ring. (Note that most zoom lenses do not have hyperfocal distance lines on them.) By choosing a small aperture, like ƒ/8 up to ƒ/22, you can set the infinity mark over the corresponding aperture mark and then everything from infinity to whatever distance is on the other side of the corresponding mark is in focus. Using hyperfocal settings makes sure that everything will be in focus and allows us to concentrate on the composition and timing the shot.
Of course, with modern mirrorless cameras, there is another way to make sure you achieve the optimum focus setting so that everything is in focus, or at least that your subject will be in focus when they come into frame. Turn on the focus peaking display in your mirrorless camera and go into manual focus mode. The focus peaking will highlight the edges of everything in focus so you can see exactly what is in focus and what isn’t. Basically, all you need to do here is adjust the focus until the area your subject will be in is sharp.
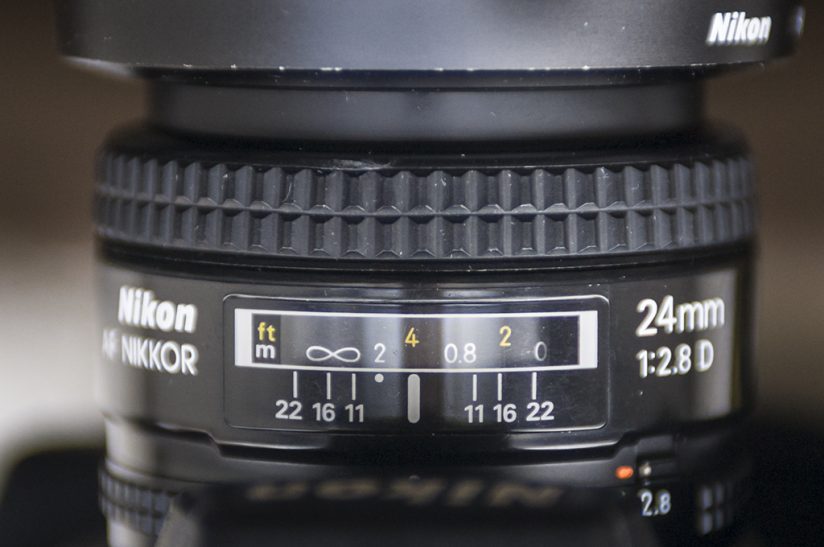
Hyperfocal settings come in handy when shooting fast-paced sports—especially with mountain bikers flying past your position or when shooting surfing in the water—if you don’t want to rely on autofocus to nail the shot.
Using Motion Blur
Sometimes, stopping the motion of the athlete completely isn’t as effective in translating the feeling of a sport than using motion blur to show some of the movement. Especially in mixed, funky lighting scenarios—like on a sunny day in a forest with patchy light—creating a motion blur image can be extremely effective.
In general, to create a motion blur, reduce your ISO to the lowest setting and then crank the aperture down to ƒ/11 or smaller, which will allow for using a slower shutter speed. If it is a bright scenario, then using a variable neutral density filter will be essential to get a slow enough shutter speed. Whatever settings used, ideally one part of the image will still be sharp, and hopefully that part of the image is your subject. Without a sharp subject, it is hard to get the viewer to lock into the image.
Figuring out the right shutter speed is the trick when capturing motion blur images. If you opt for a super slow shutter speed, then you will have too much blur and it will be very difficult to get your subject sharp. If you opt for too fast of a shutter speed, then the blur effect is not very effective. The correct shutter speed depends on how fast your subject is moving. For a trail runner, it might be 1/10 sec., for a mountain biker it might be 1/30 sec., and for a Formula One driver it might be 1/125 sec. I suggest experimenting until you find the shutter speed that works.
As a bonus tip, using rear curtain sync flash along with a slow shutter speed is also a very effective way of creating sharp motion blur images. The key to using flash effectively with motion blur images is to have a flash or strobe with a very fast flash duration so it freezes the motion of the athlete.
Strobe Techniques
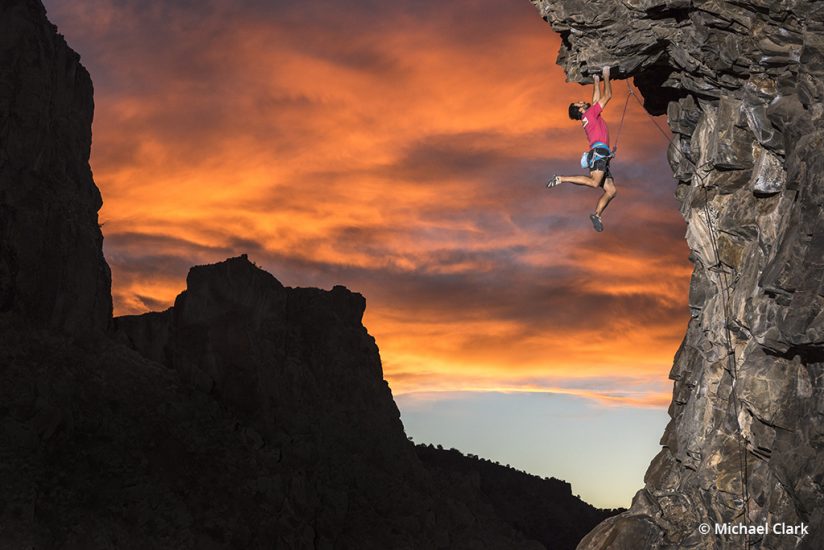
In the past few years, strobe manufacturers have come out with very advanced flash features that allow us to shoot at any shutter speed available when syncing with flash. These two advanced strobe techniques are High Speed Sync (HSS) and Hi-Sync (HS). High Speed Sync works very well if you can get the strobe close to your subject. For those situations where the strobe needs to be farther away, Hi-Sync is the best choice.
Hi-Sync flash is a revelation for adventure sports photographers. Using one 1200 Ws battery-powered strobe pack, I can overpower full sun from 40 feet away. Under cloudy skies, that distance can be extended even further. Hi-Sync also enables me to completely control the background exposure as well, to turn day to night using a flash. For adventure sports, this represents the bleeding edge of both technology and full control over the image. Most of the artificially lit images in this article were created using Hi-Sync techniques with Elinchrom strobes.
It’s Worth The Effort
Adventure sports photography is a mixture of outdoor skills and photography skills. Knowing the limits of your abilities and what your camera is capable of all come into play. Capturing top-end adventure sports images is like trying to align the planets. Not only is the timing of the action critical, planning your shoot to ensure it happens with the best possible light and in the type of weather you want can take a lot of effort. In the end, that is all part of the fun.
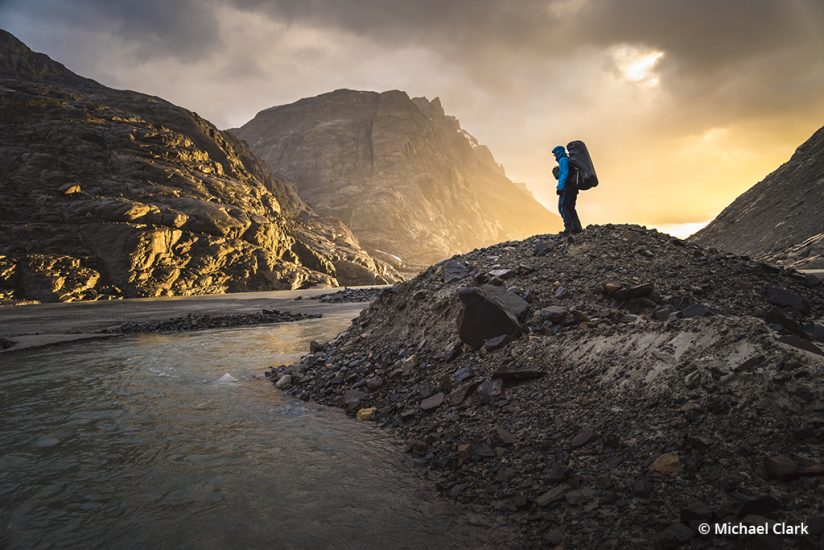
Nikon D810, AF-S NIKKOR 24-120mm f/4G ED VR at 24mm. Exposure: 1/640 sec., ƒ/5.6, ISO 800.
As famed National Geographic photographer Jim Richardson is fond of saying, “If you want better images, stand in front of more interesting stuff.” With adventure sports photography, the subject matter is always quite exciting.
The post Challenge Accepted appeared first on Outdoor Photographer.

