From camera gear to composition, exposure settings and post-processing, many elements go into successful night sky landscapes that reveal the details in the terrestrial foreground under a spectacular canopy of stars. In this article, we’ll focus on the basic technique of combining foreground and sky exposures into a single image with sharp stars. I prefer to use only exposures that I captured in the same place on the same night without moving the camera. Let’s start by looking at a finished photo (Figure 1) and break down the separate exposures that went into creating it.
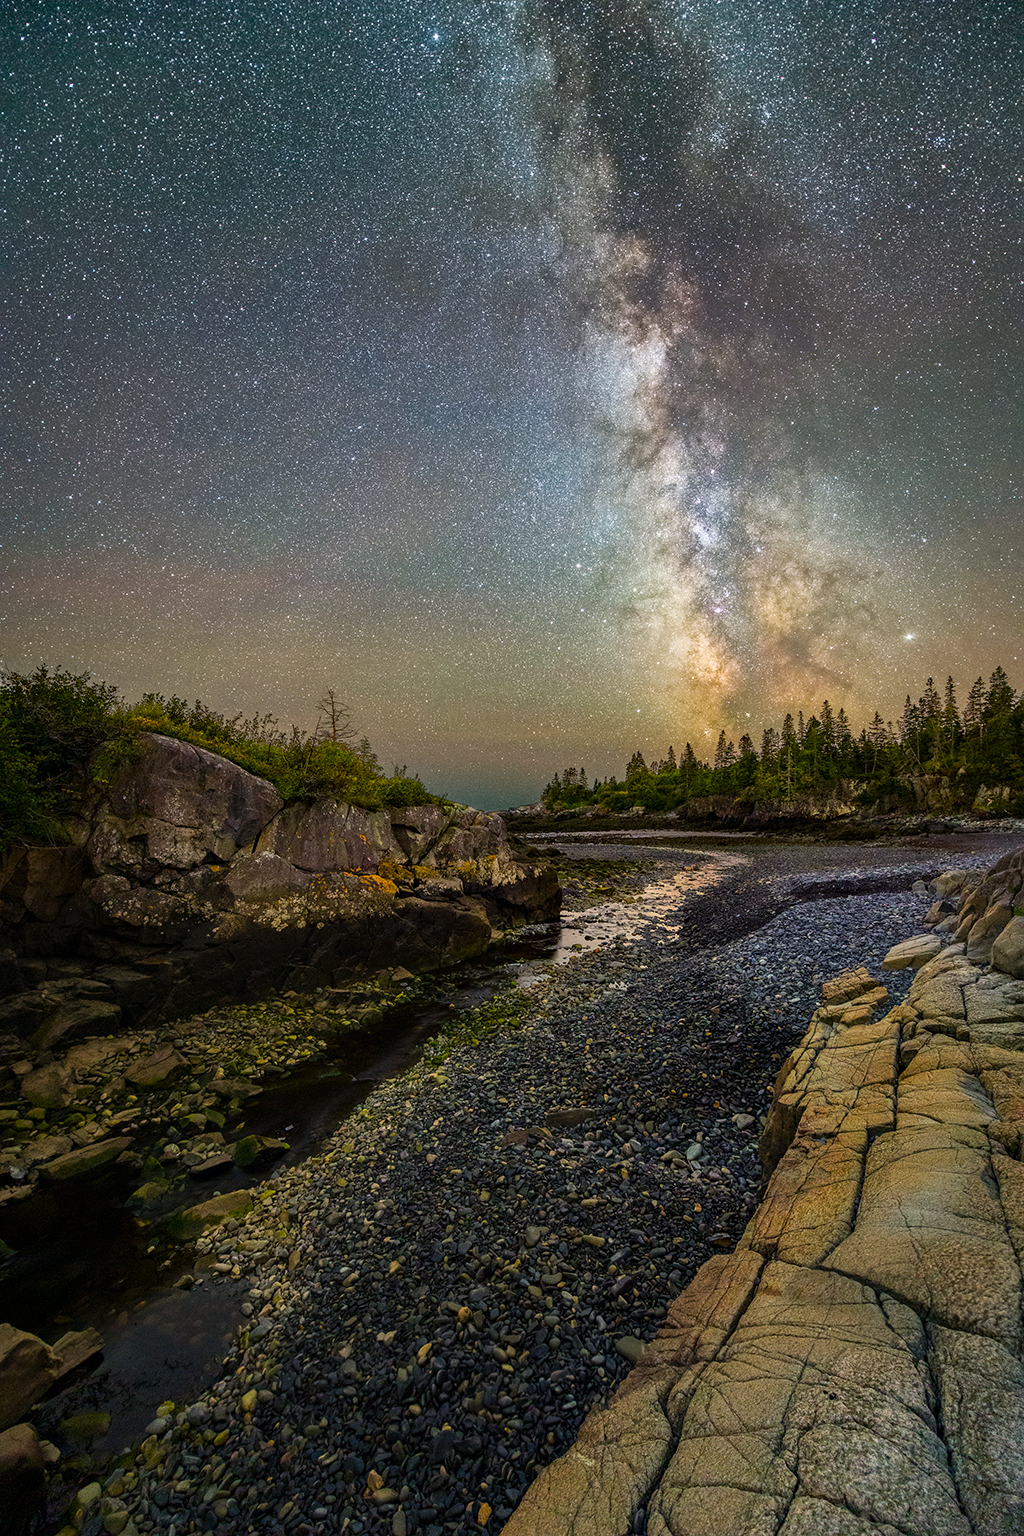
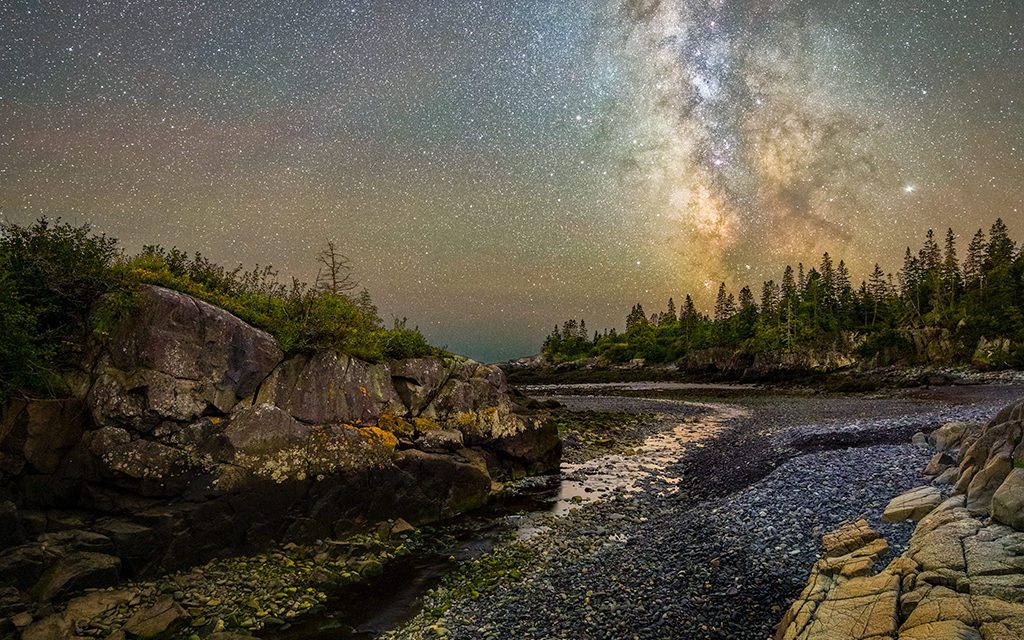
Figure 1. Milky Way on the coast of Maine.
Make Separate Exposures For Night Sky Landscapes
This image captures the Milky Way rising over a rocky beach on the coast of Maine. The final composite consists of separate sky and foreground exposures that were blended in Photoshop. Why do we need separate exposures? Why can’t we just take a single exposure of the scene and call it good? There are a few reasons.
Earth spins on its axis at about 1,000 miles per hour at the equator. The speed decreases as you move north or south away from the equator, but the effect on our viewing of the night sky is the same wherever you are on Earth—the stars appear to “move” through the sky over time, but in reality, it is the Earth’s rotation that causes the perceived movement. You may not notice it when you stand outside gazing up at the stars, but look closely at the location of a particular constellation and then check again a few minutes later, and you’ll notice it’s now a little more to the west. Earth rotates toward the east, so everything appears to move west.
This is great for creating star trail images. Open the shutter for a long time, and you’ll get an image with bright arcs or lines of the stars moving through the sky. But since we’re interested in capturing sharp, pinpoint-like stars, we need to use a shutter speed short enough to prevent star trails. This means using relatively short exposures considering how dark the night sky is. With a 14mm lens on a full-frame camera, you’re limited to about 10 seconds before the stars move enough to create trails.
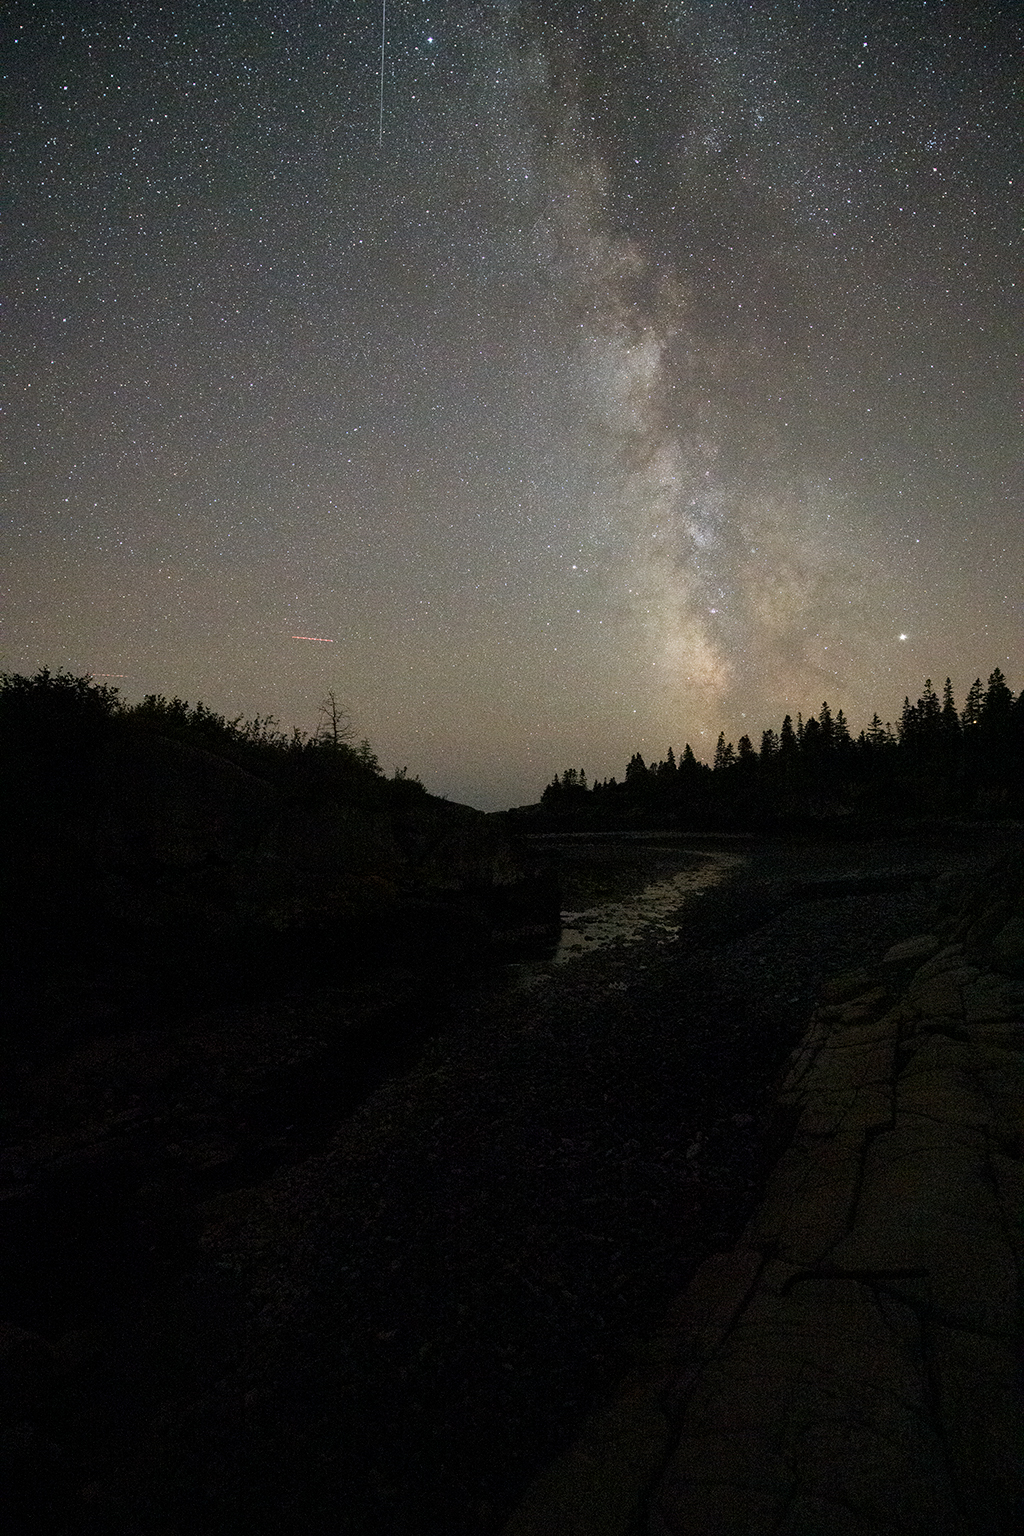
Figure 2. This is the RAW capture of the sky, taken with a Nikon Z 7, the FTZ lens adapter and the AF-S NIKKOR 14-24mm F2.8G ED at 14mm. Exposure: 10 seconds, ƒ/2.8, ISO 6400.
What happens if we shoot a 10-second exposure in a dark location like this? We get something like Figure 2. This is how the RAW file looks in Lightroom Classic without any edits. As you can tell, it’s very dark. When we brighten the exposure in Lightroom Classic, we get Figure 3.
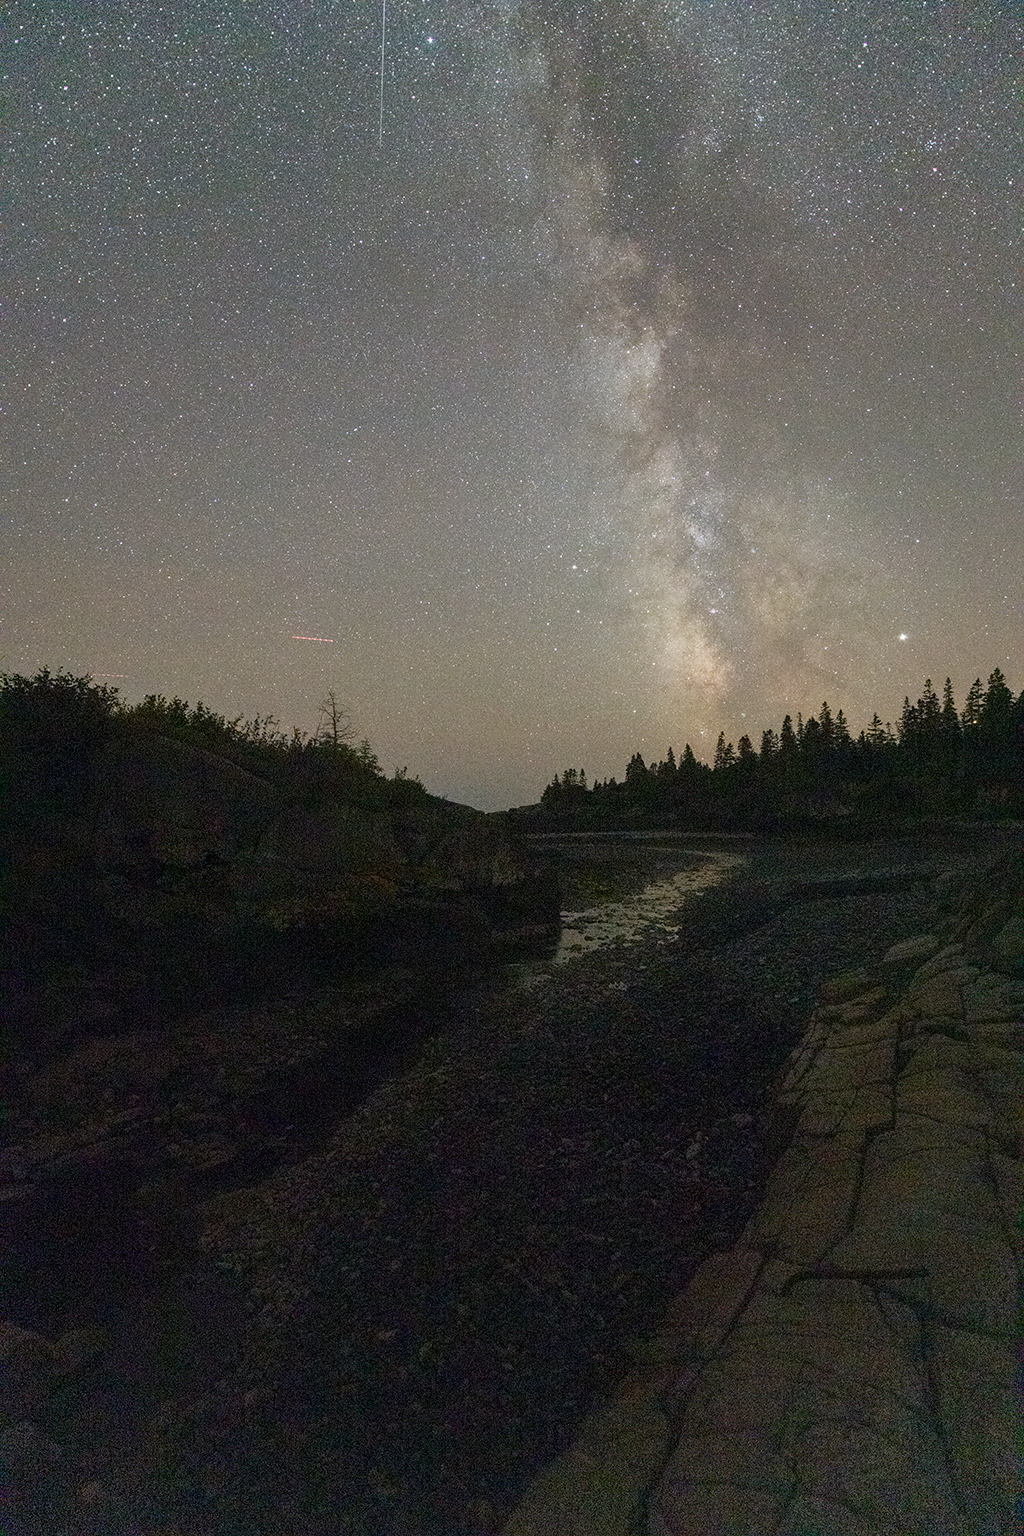
Figure 3. The 10-second sky exposure after adjustments in Lightroom.
The sky looks much better now. We can see detail in the stars, and the Milky Way is already popping to life, but the foreground still doesn’t look very good. Let’s take a closer look in Figure 4.
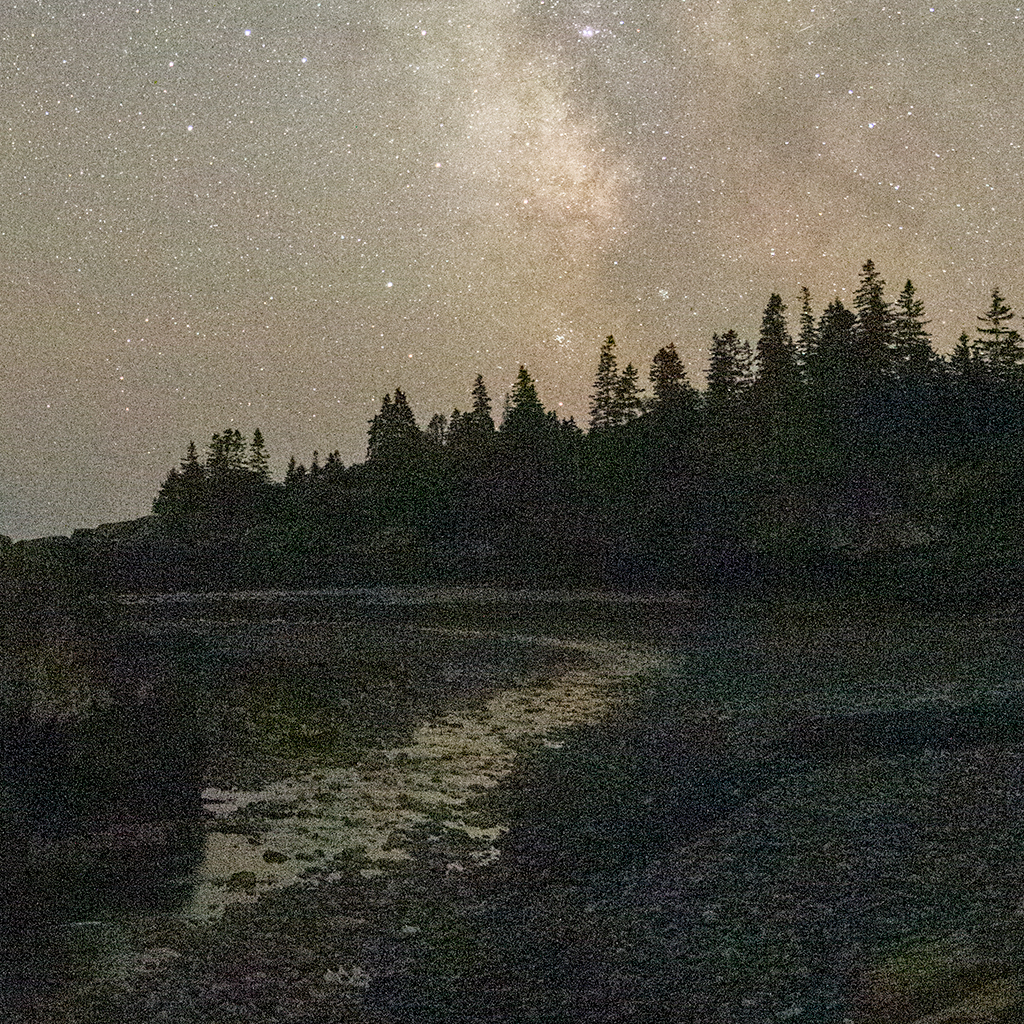
Figure 4. Detail of the sky exposure after adjustments.
The sky looks pretty good, there’s definitely noise, but it’s manageable with a little noise reduction, and we could drastically reduce the noise with star stacking techniques if desired. The foreground, on the other hand, is very noisy and unusable.
For a situation like this, we need a way to have a brighter and less noisy foreground if we want to make high-quality night sky landscapes. Noise reduction software isn’t going to save this foreground; it’s just too dark and has too little detail. What we need is more light.
We could use “light painting,” adding artificial light to the scene to illuminate the foreground, but I almost always prefer to use the natural ambient light. To capture more light, I will take at least one additional shot for the foreground using a lower ISO and longer shutter speed. The shutter speed to use varies with the amount of ambient light on the scene. It could be 30 seconds or 10 minutes.
In this location, I chose to capture a foreground exposure with a shutter speed of 10 minutes at ISO 1600. This provided plenty of light to capture detail in the foreground without a lot of noise. Figure 5 is a single 10-minute exposure straight out of camera with no adjustments in Lightroom Classic.
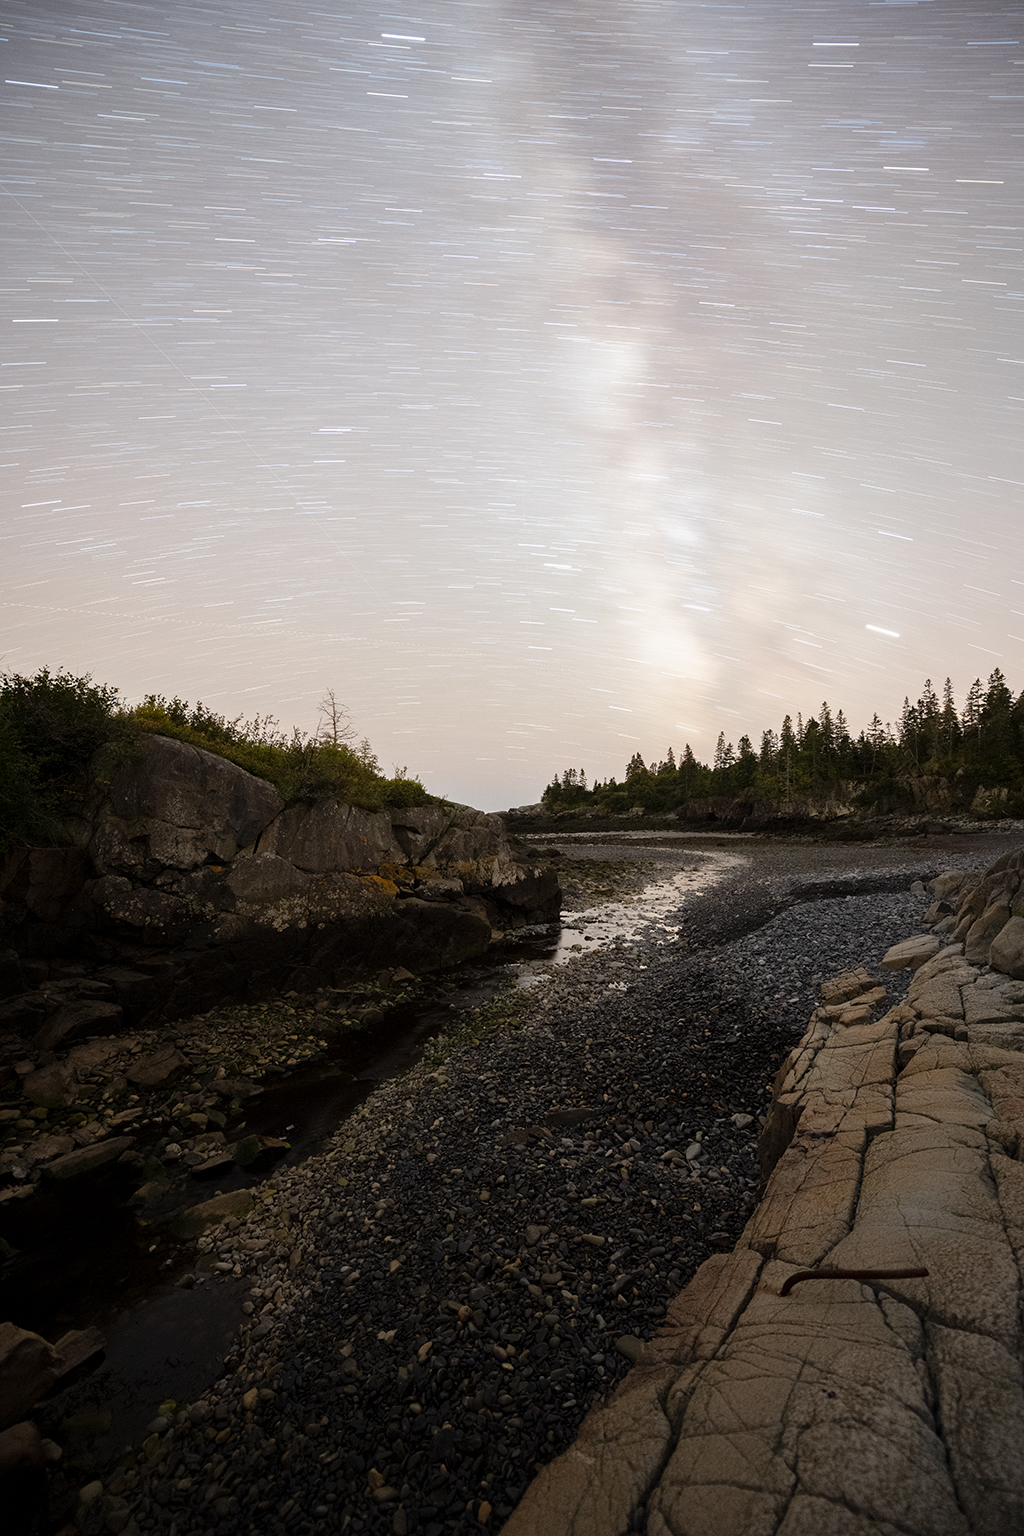
Figure 5. A 10-minute exposure of the foreground.
Now, let’s do some basic adjustments in Lightroom Classic for white balance and brightness and remove the lens vignetting (Figure 6). Much better. There is a lot of detail in the foreground.
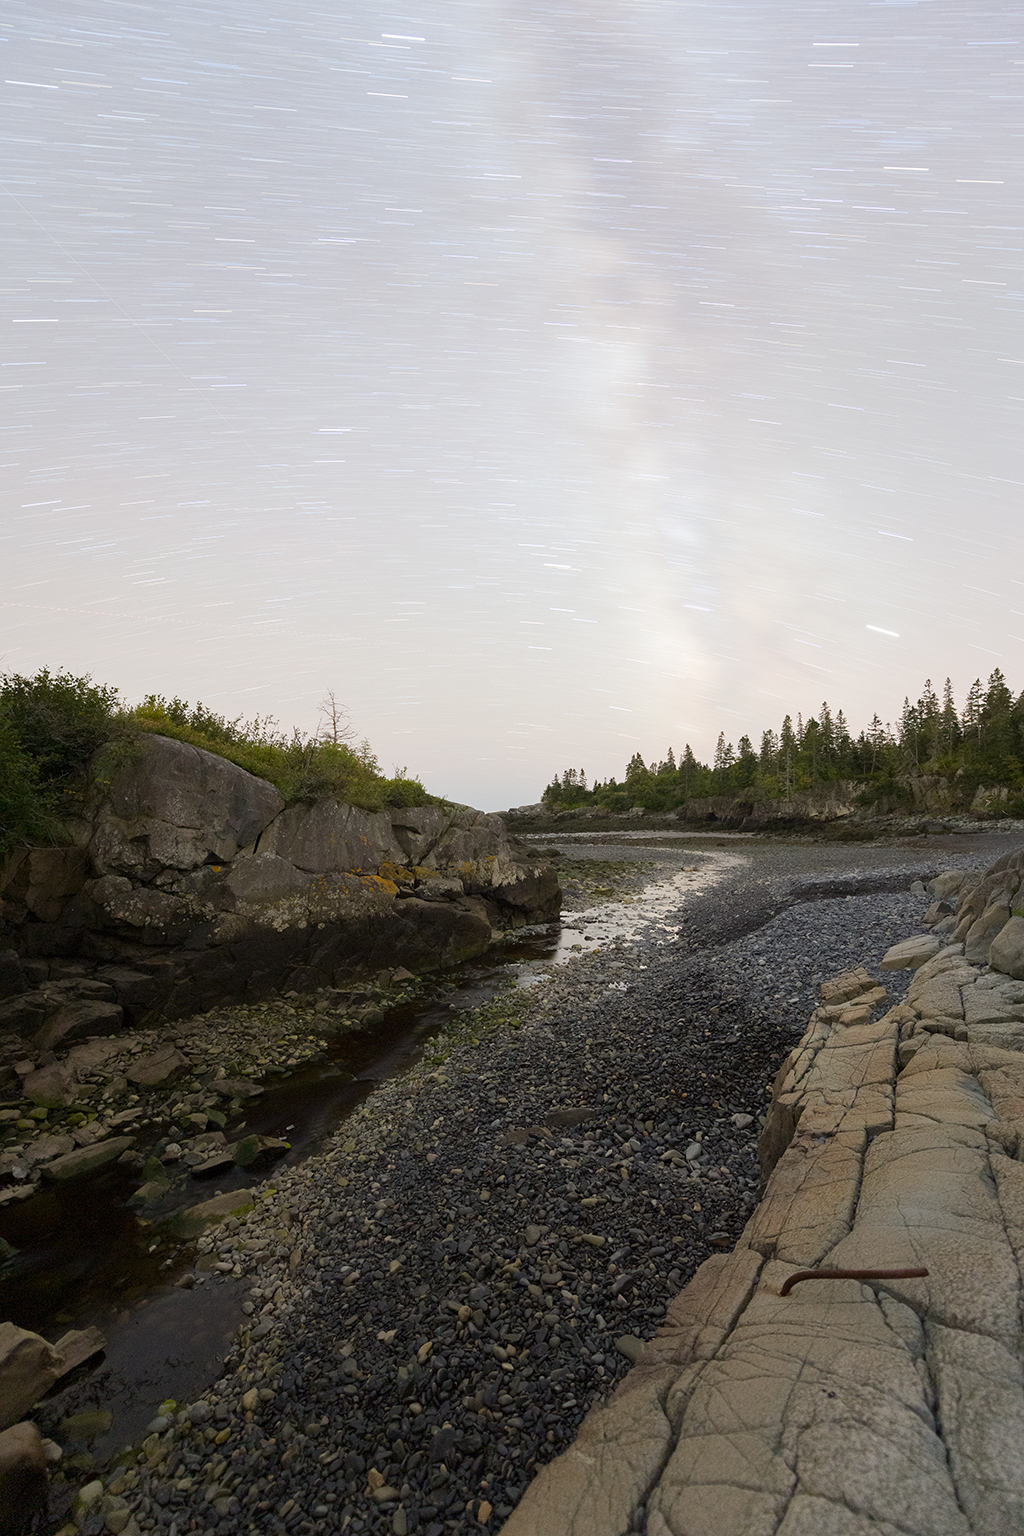
Figure 6. The 10-minute foreground exposure after adjustments in Lightroom.
Have a closer look in Figure 7. We now have a lot more detail in the foreground with much less noise. The stars have streaked considerably because this is a 10-minute exposure, but that’s not an issue, since we are only going to use this exposure for the foreground in the final blended image. We can blend the sky and foreground exposures together in Photoshop with layer masking.
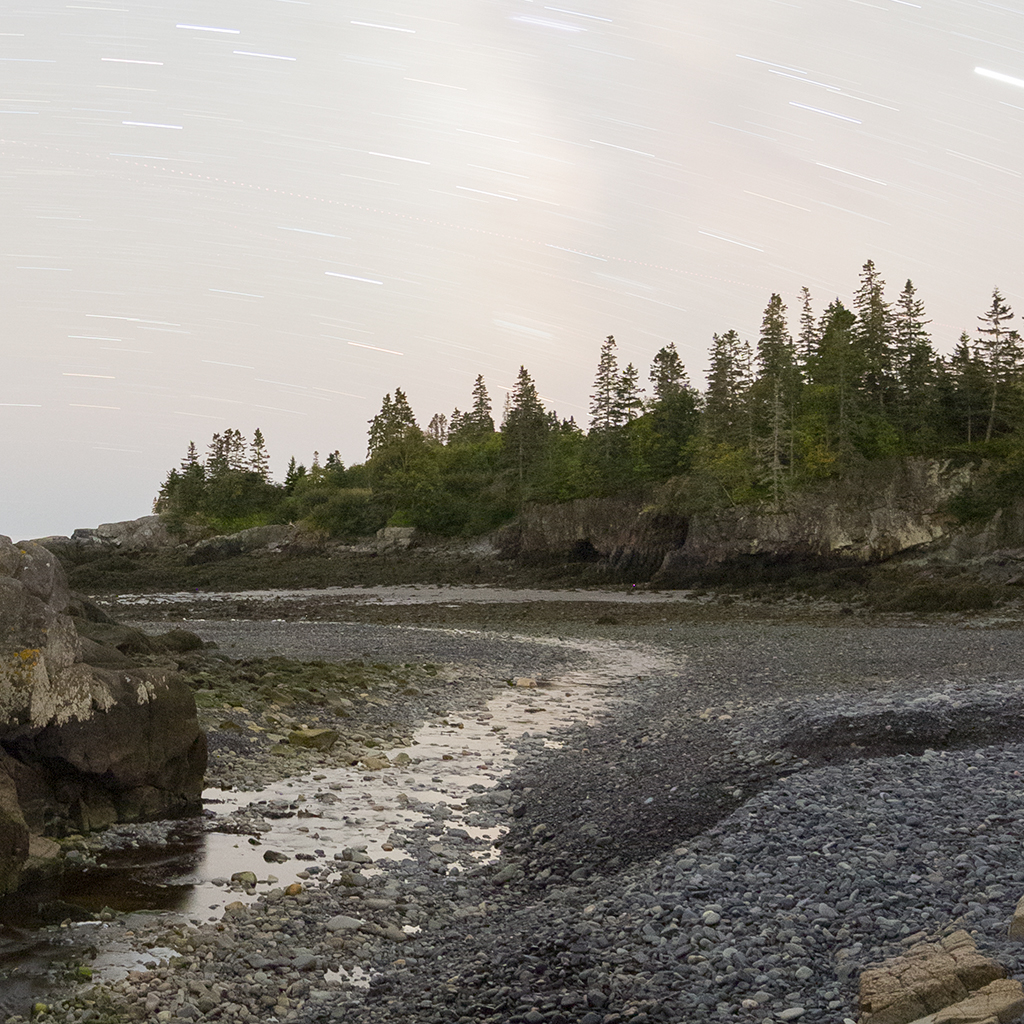
Figure 7. Detail of the foreground exposure after adjustments.
Foreground Focus & Exposure Considerations
We have a much better foreground exposure, but the foreground is not in focus for the entire scene. This particular foreground exposure was taken with the focus set to the stars at ƒ/2.8. At 14mm on full-frame camera, there’s decent depth-of-field at ƒ/2.8, but not enough to have the entire foreground in focus. In this exposure, the horizon (distant trees) and some of the distant beach are in focus, but the rocks closer to the lens are soft. This will vary depending on your composition and how far the foreground objects are away from your lens.
You always want at least one exposure for the foreground taken with the same focus as the stars. This keeps the edges of the horizon in the same spot between the exposures, which makes for much easier alignment and blending in Photoshop.
Let’s take a closer look at the foreground to see where the focus falls off in Figure 8. The rocks toward the bottom of the frame start to get soft. In order to have those rocks in focus, we can take another exposure using the same settings except with the focus pulled in so that those rocks are sharp and then combine these exposures using focus stacking technique. To adjust focus, use a flashlight to light up the scene if possible and use live view on your camera and manually change focus until you have the scene focused where needed. You can also use autofocus; just make sure to turn it off after so you don’t accidentally change focus in the dark.
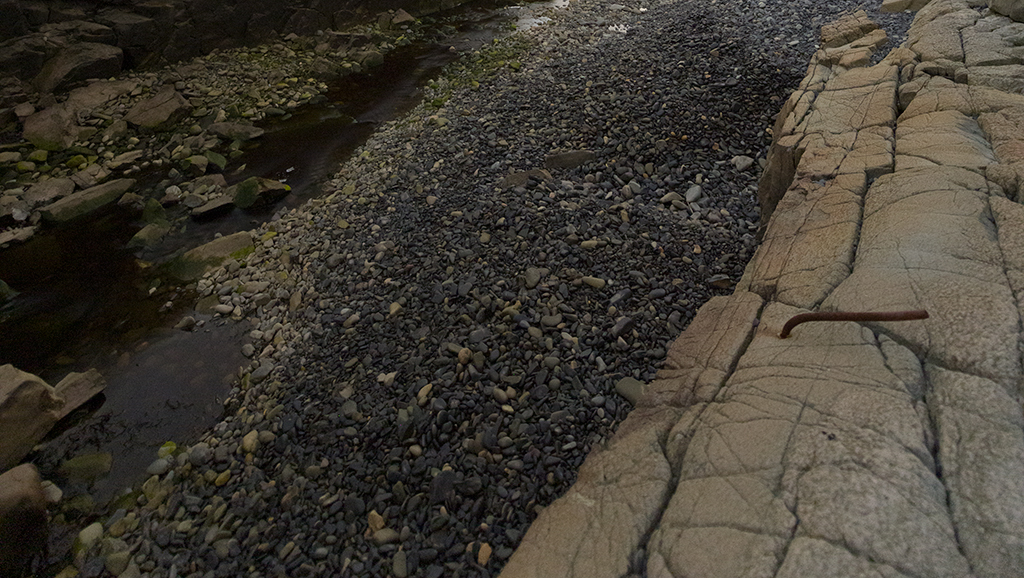
Figure 8. There is some softness in the foreground rocks as a result of shooting at ƒ/2.8. To address this, I recommend using focus stacking technique rather than stopping down your aperture (and therefore needing even longer exposure times).
You could also stop down the lens (use a smaller aperture) for a greater depth of field, so you only need one exposure to get the entire foreground in focus, but this ends up dramatically increasing your exposure time. For example, I was using ƒ/2.8 for the foreground at 10 minutes and ISO 1600, but let’s say I used ƒ/8 to get the entire foreground in good focus. For every additional full-stop increment, the amount of light collected is cut in half, and ƒ/8 is three stops down from ƒ/2.8. Cutting the light collected in half for each of those three full stops means that the amount of light we would collect in a 10-minute exposure at ƒ/8 would be one-eighth of what we would gather if we used ƒ/2.8. That would be way too dark to have enough detail, so we would have to increase the shutter speed to make up for the loss of light.
If we wanted to use ƒ/8 and capture the same amount of light as we would have at ƒ/2.8 for 10 minutes, we would need to decrease the shutter speed by three stops, which means doubling the length of the exposure three times—that’s 80 minutes! This is certainly possible, but now the risk of the image being ruined is much higher, since we could accidentally bump the tripod, or, depending on the location, perhaps a car could drive by or another person could turn on their headlamp by accident.
MASTER STAR PHOTOGRAPHY
Astrophotography 101
A guide to capturing the stars, with key camera settings, equipment recommendations and tips for success. Read now.
There are lots of reasons that a long exposure could be ruined in the dark, including the fact that it’s easy to screw up a setting and end up with an unusable photo—and you wouldn’t know that for 80 minutes in this scenario.
Another alternative to make up for the lack of light with a smaller aperture would be to use light painting, allowing for a much shorter shutter speed, but again, I prefer the ambient light of the scene for night sky landscapes. So when foreground sharpness is critical, I will take multiple foreground exposures with the focus pulled in as needed and blend these with focus stacking. Sometimes I just need one foreground exposure; sometimes I need three or more. It just depends on the composition, how far the foreground objects are from the lens, and the end result I’m trying to achieve.
Combining Exposures: Putting It All Together
Once you have all the exposures you need for the stars and foreground, it’s then a matter of using software to adjust the images, possibly using star stacking and focus stacking techniques, and then bringing the sky and foreground exposures into Photoshop to blend them together using layer masking into a single image that has low noise and sharp focus from the foreground to the stars.
Creating detailed, balanced images of night-sky landscapes is a multi-step process that takes some practice both in the field and in post-processing, but the results are worth the effort.
The post How To Photograph Night Sky Landscapes appeared first on Outdoor Photographer.

